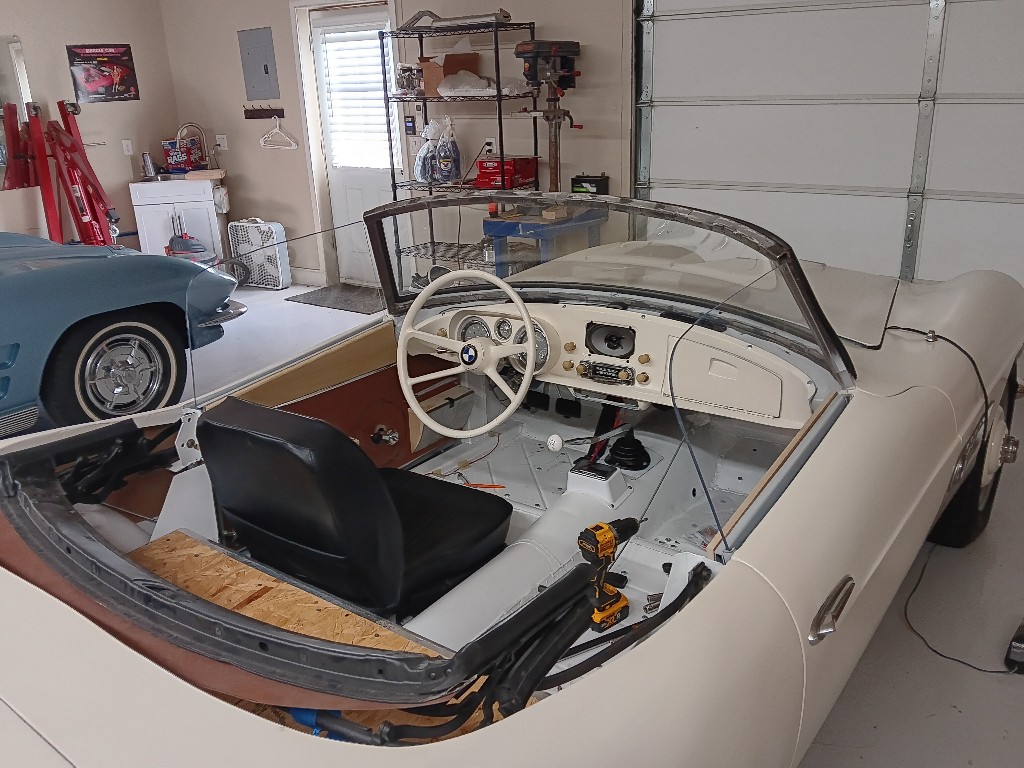
With the distractifications out of the way, I can resume progessiveness

on the 507. Doors were on the list of things to finish up along with, um, everything else. I chatted with my upholstery guy and came up with a plan for that when the time comes. I told him about how I planned to make the door panels and he said, “You make it, I will upholster it.” I just love guys that are so confident in their chosen trade.

I made the panels to mimic the originals with a few exceptions based on my specific doors. Mainly, the long arm rest had to be separated due to the window regulator on my car being lower than the original.
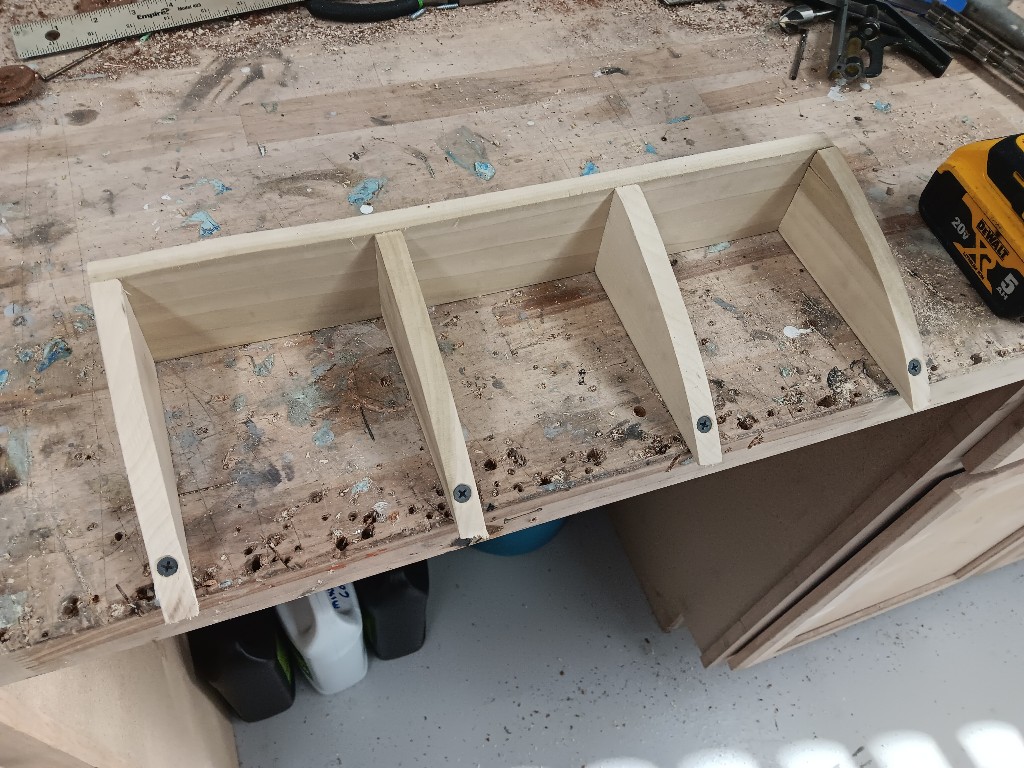
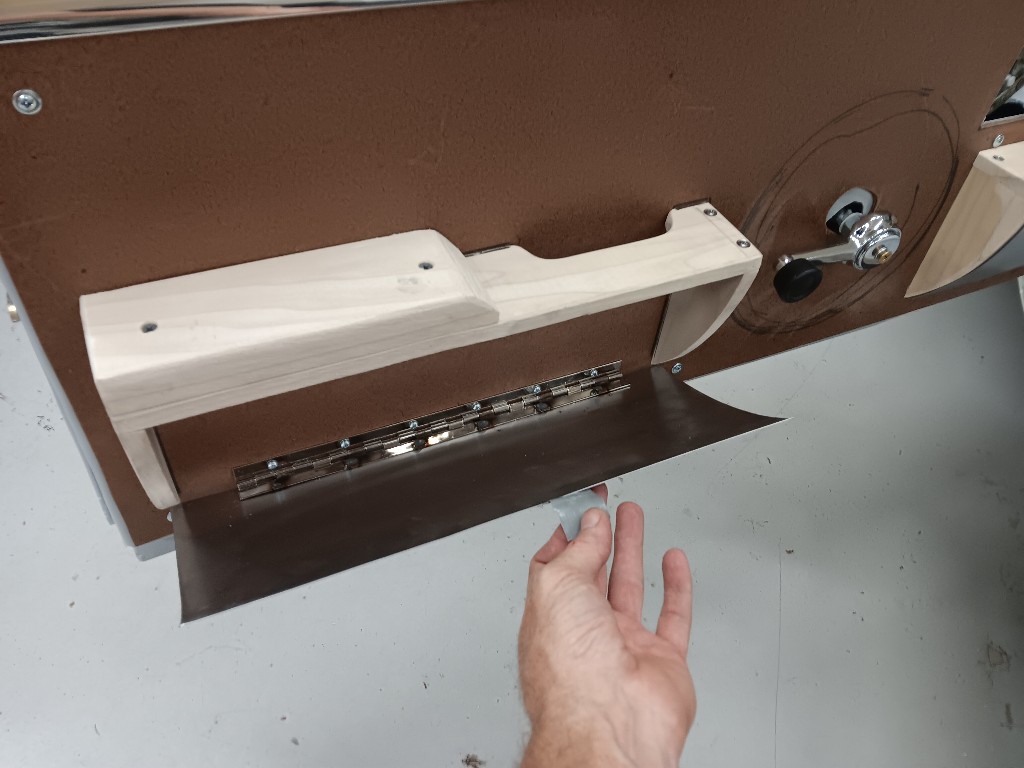
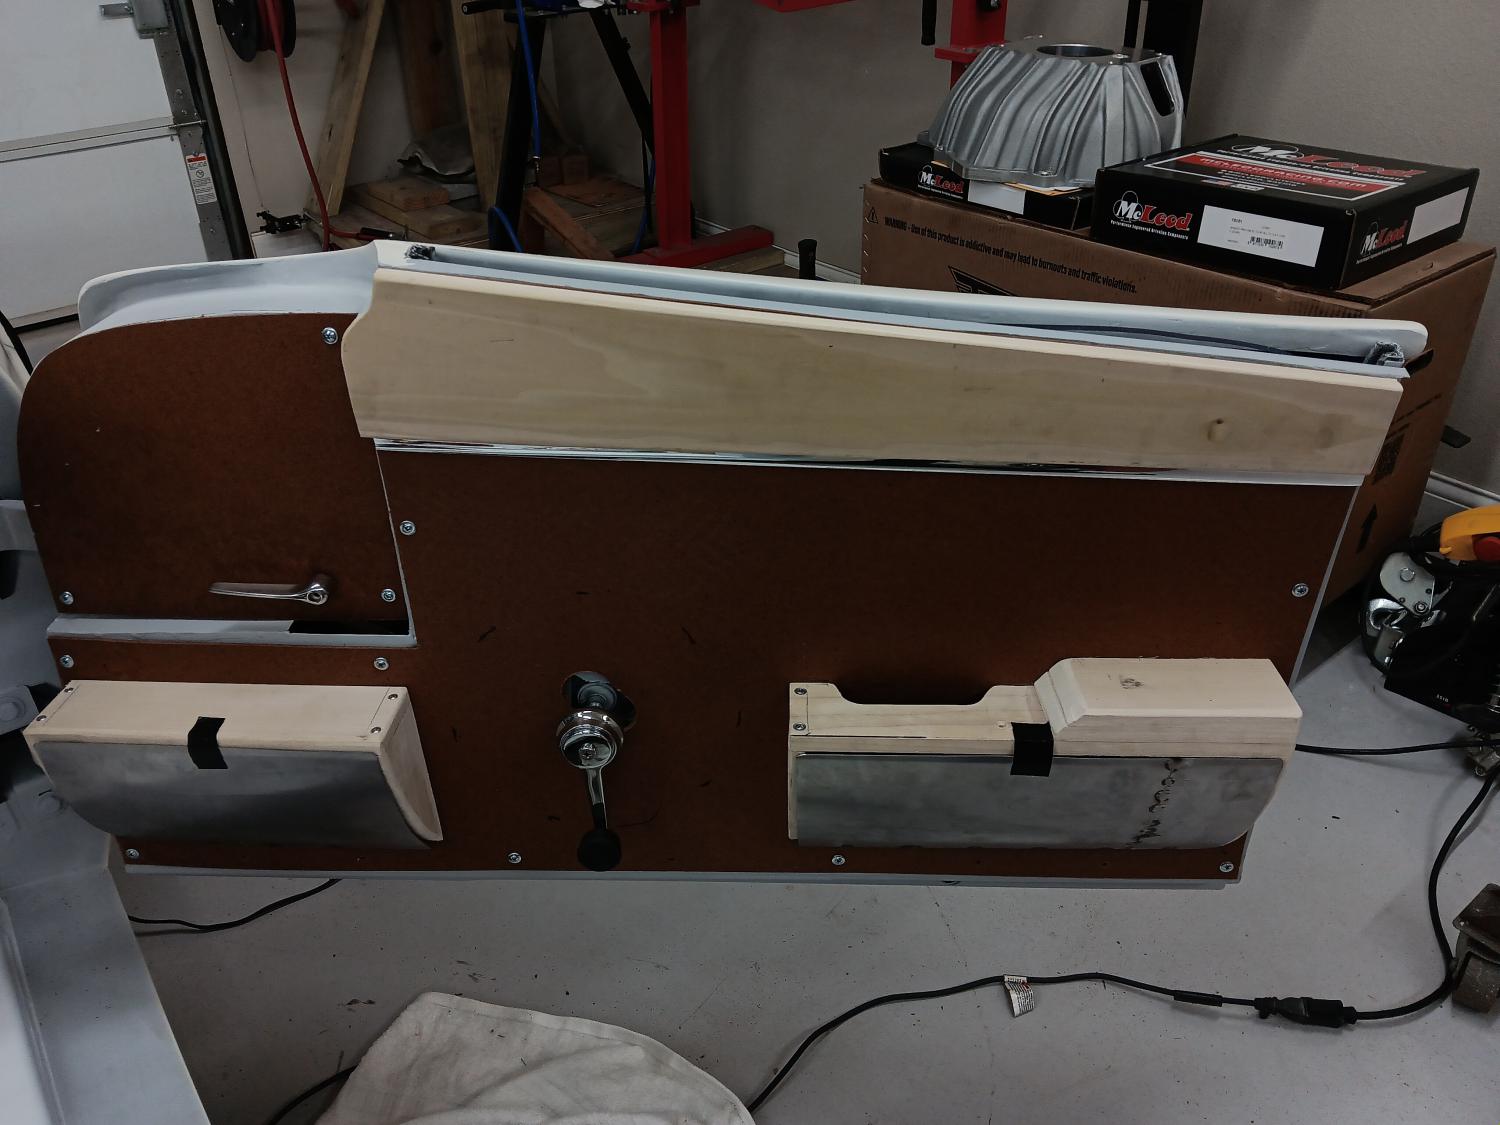
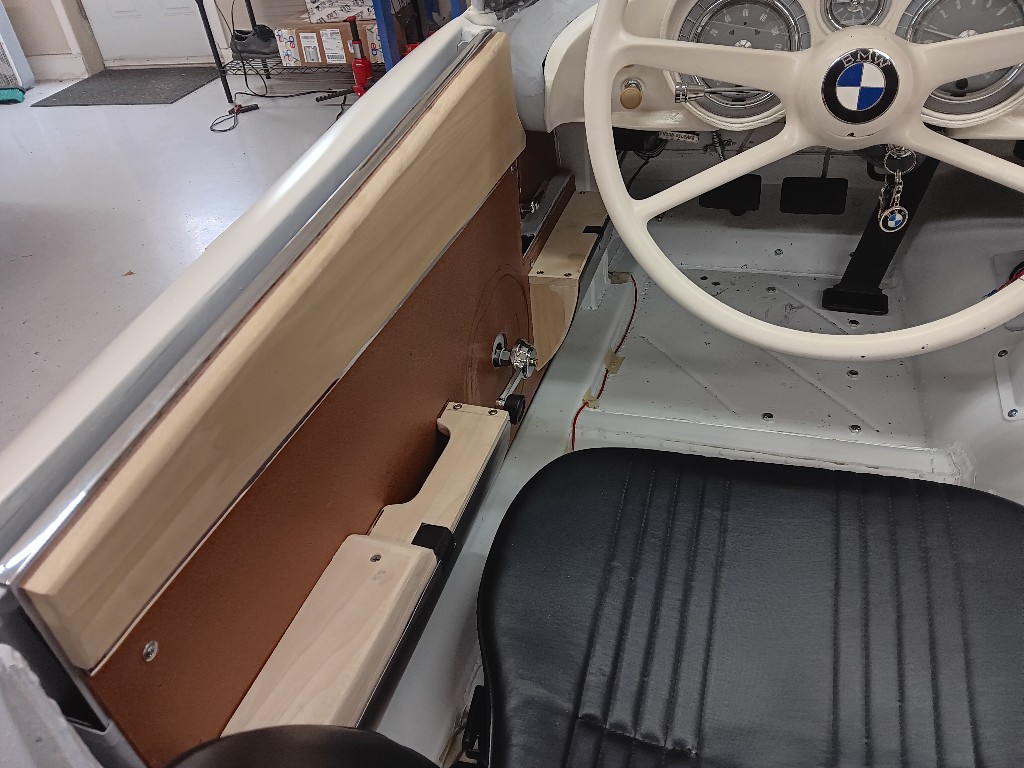
I still was able to incorporate the two pockets with hinged doors like original. I made a mini-wood buck for the door doors (door doors?

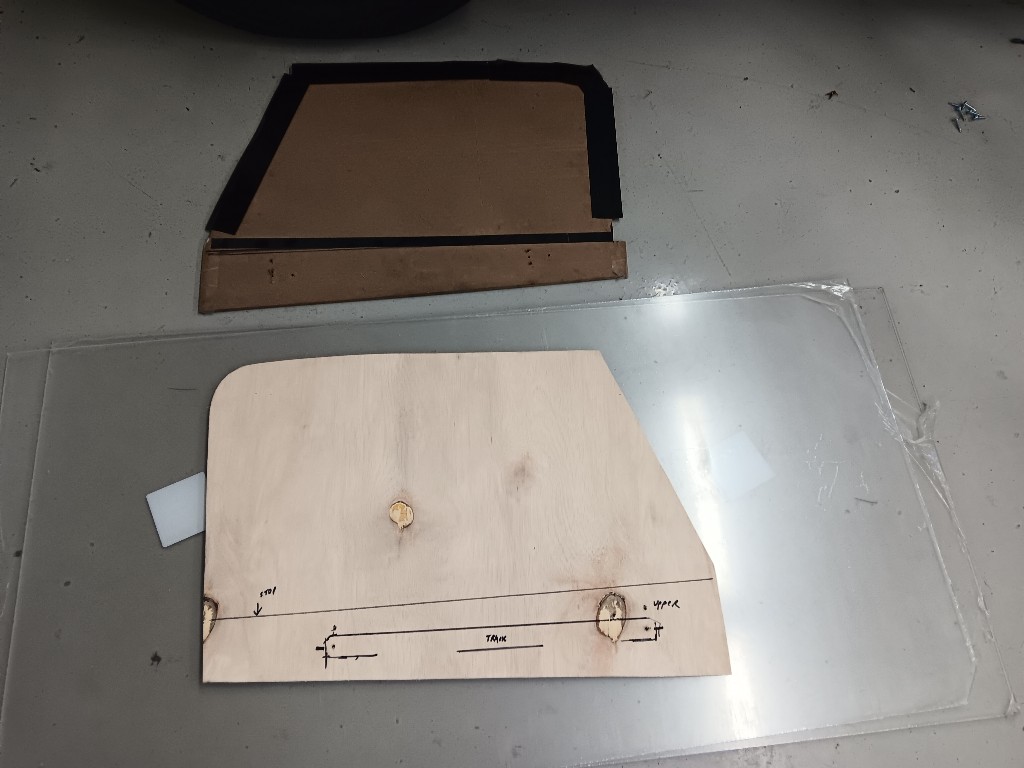
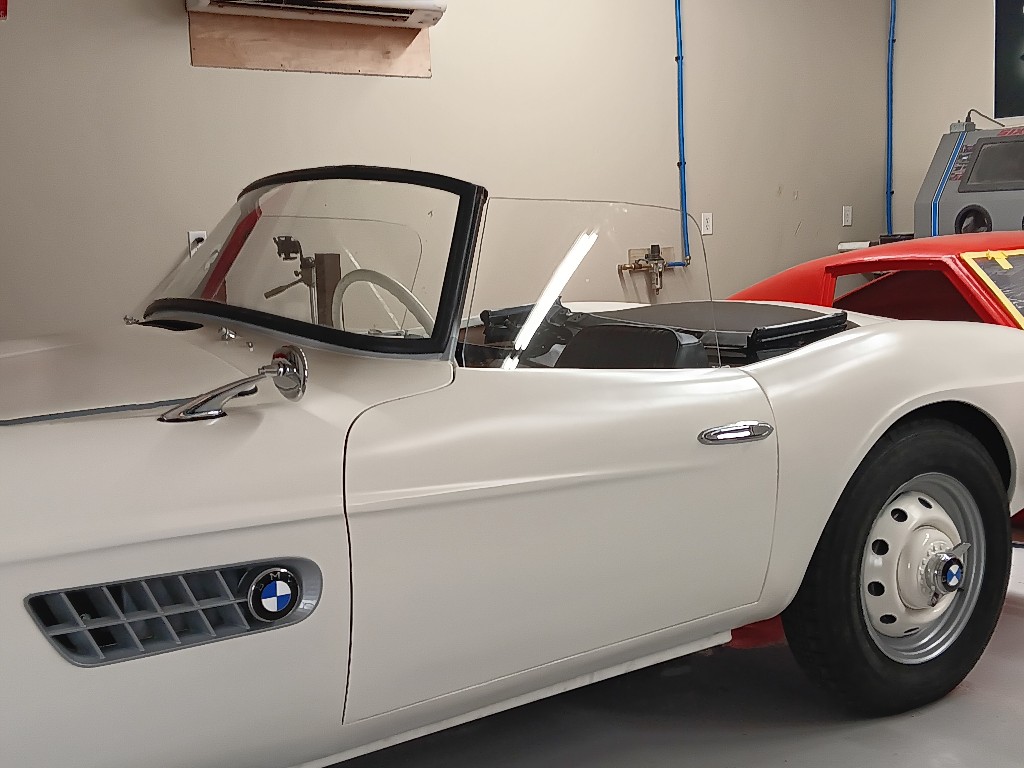
) which allowed me to get the shape right. Glass was already patterned earlier with an MDF panel, but I fine tuned that with some tape and then cut the panels out of 1/4”plastic. This will be the final pattern for the glass guy to use when the time comes. The roll up and down nicely!

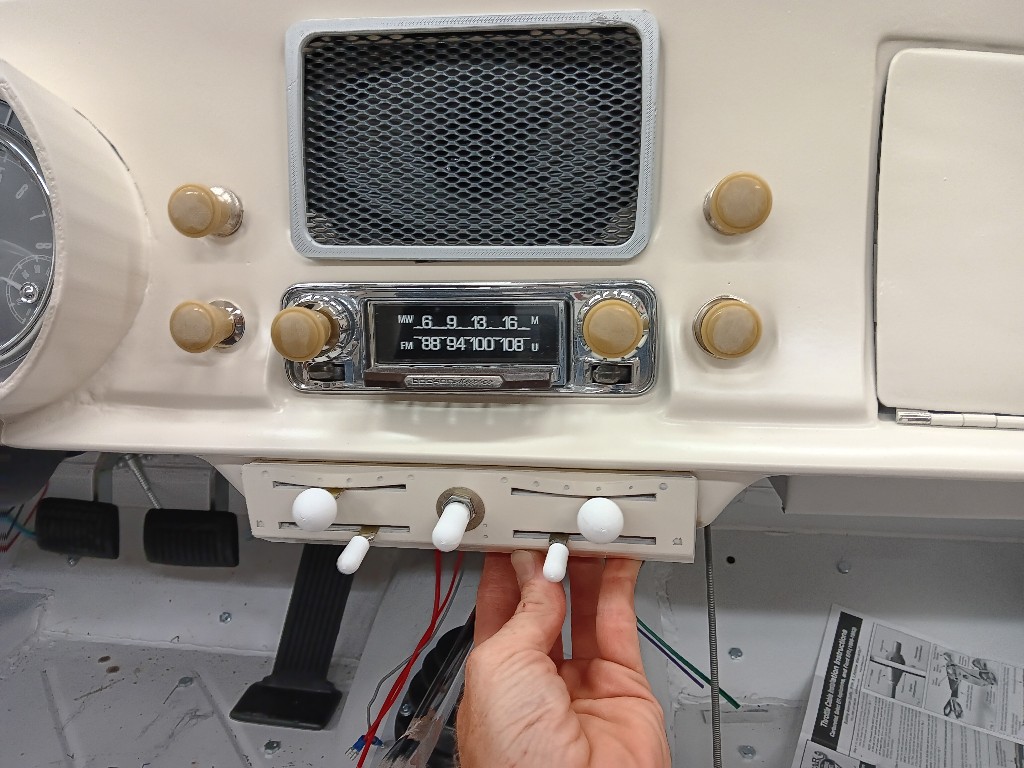
I 3D printed the heater control bezel along with knobs. The sliders are from an MG that I cut a welded up fit my dash space. The bezel also has the correct markings on it (color inside the circles to follow) with gradient indicators on each up the upper sliders and direction arrows for the footwells too. Two speed heater fan indicator reliefs too!
I’m not overly happy with those door panels based on the placement of the window crank. I’m thinking after all is said and done and then car is disassembled for paint, I may install power windows to eliminate the regulator and move a “dummy” crank handle to the correct position allowing me to make another arm rest to the proper length. I know they make switches that you can mount a window crank on which gives the appearance of the manual window yet is the power window switch under it. We’lll see.
Next up is the A-pillar trim out and I’m off to the metal shop to get supplies to make a hardtop. Woohoo!!!! And with no more distractions, I’m hoping to have it move under its own power this week.
Stay tuned, more to come!
Cheers
Dave