
|
|
|
#621
 05-21-2016, 11:51 AM
|
||||
|
||||
|
That's rust from the end of an old steel barbell I was using as a drift to try to knock the broken stub in far enough to remove the c clip.

|
|
#622
05-22-2016, 05:49 PM
|
||||
|
||||
|
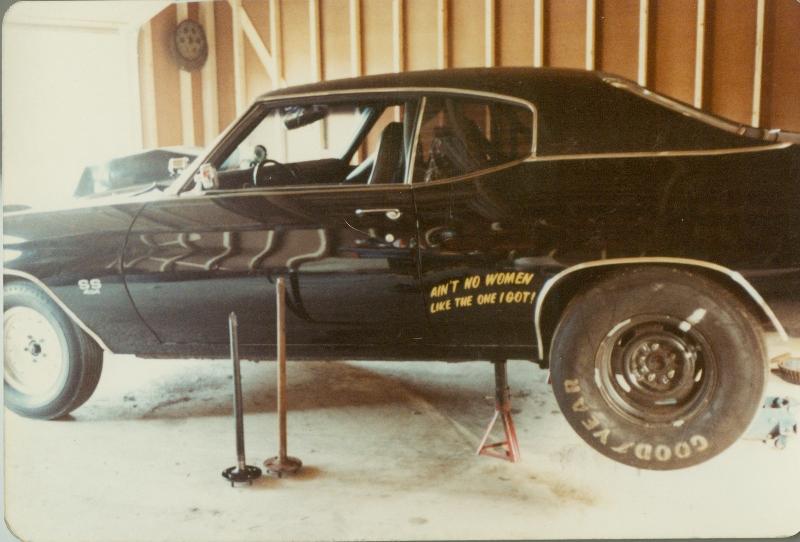
Well, after spending the better part of the day yesterday researching 12 bolt components, I've decided that for the time being I'm going to install a new pair of Strange axles along with their c clip eliminator kits. The Yukon axles that were in the car are a quality product, but the car obviously took them past their limits. Unless I want to go to a 33 spline Eaton posi (MORE $$$) or a 35 spline spool (not happening on any street car of mine), the Strange axles are my best investment. As much as I'd love to keep a 12 bolt under the car, at this weight and power level with a stick trans, it just doesn't make sense to pour money into a 12 bolt when there is a far better alternative.
The plan is to get it back together and get it to the track again, but for the time being it'll be easy launches--nothing above 3K. I still want/need to establish a representative baseline with the 4.56 gears before I make any other changes. Once that has been accomplished, the (reasonably) near-future goal is to get a Strange S60 rear under the car. That will be able to take anything I want to throw at it--and more. Ordering the Strange parts tomorrow, hopefully I'll have everything buttoned back up soon. More eventually.
|
|
#623
05-22-2016, 06:04 PM
|
||||
|
||||
|
Where's the old thread on the Suburban build? You need to update that when you do the brakes. [img]<<GRAEMLIN_URL>>/biggthumpup.gif[/img]
|
|
#624
05-22-2016, 06:08 PM
|
||||
|
||||
|
Already in the works! [img]<<GRAEMLIN_URL>>/biggthumpup.gif[/img]
|
|
#625
05-25-2016, 09:45 PM
|
||||
|
||||
|
Just received email confirmation that my new axles will be here tomorrow.
Not bad--order custom axles on Monday, they ship out 2 days later. Kudos Strange. [img]<<GRAEMLIN_URL>>/biggthumpup.gif[/img]
|
|
#627
05-25-2016, 10:42 PM
|
|||
|
|||
|
I had the same problem with a axle . This was in 1979 and I tow bared the car to the track.
__________________
69 RS SS L78 conv 69 RS SS ZL1 69 L78 Chevelle conv 69 L78 Nova 69 L34 Nova 67 SS Chevelle 73 Trans Am
|
|
#628
05-28-2016, 08:14 PM
|
||||
|
||||
|
Been slugging away at this job as I've had the time--naturally it's a <span style="font-style: italic">leeeeetle</span> bit more involved than the instructions on their website indicate. [img]<<GRAEMLIN_URL>>/smirk.gif[/img]
On the plus side, these axles are sum BEEFY sumbitches. [img]<<GRAEMLIN_URL>>/grin.gif[/img] Pics & a detailed installation story forthcoming--but now I have babyback ribs to attend to, so the Chevelle will haf'ta wait `till tomorrow. [img]<<GRAEMLIN_URL>>/biggthumpup.gif[/img]
|
|
#629
05-29-2016, 01:23 AM
|
||||
|
||||
|
Below is a side-by-side comparison of the Strange axle next to the Yukon replacement axle:
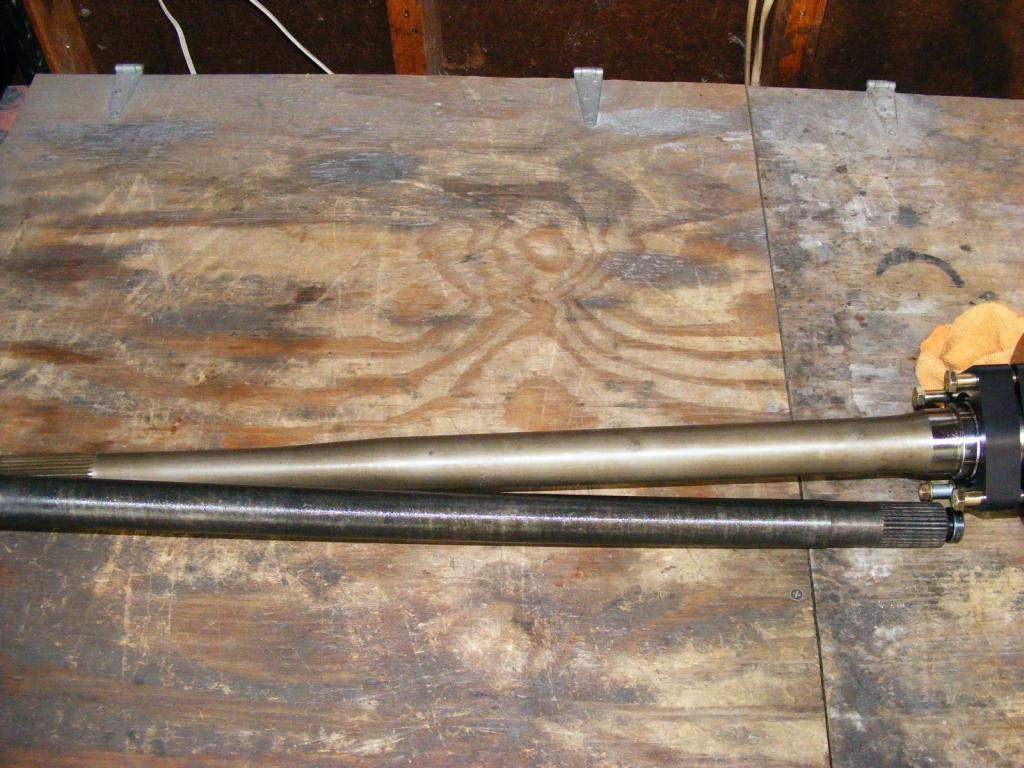 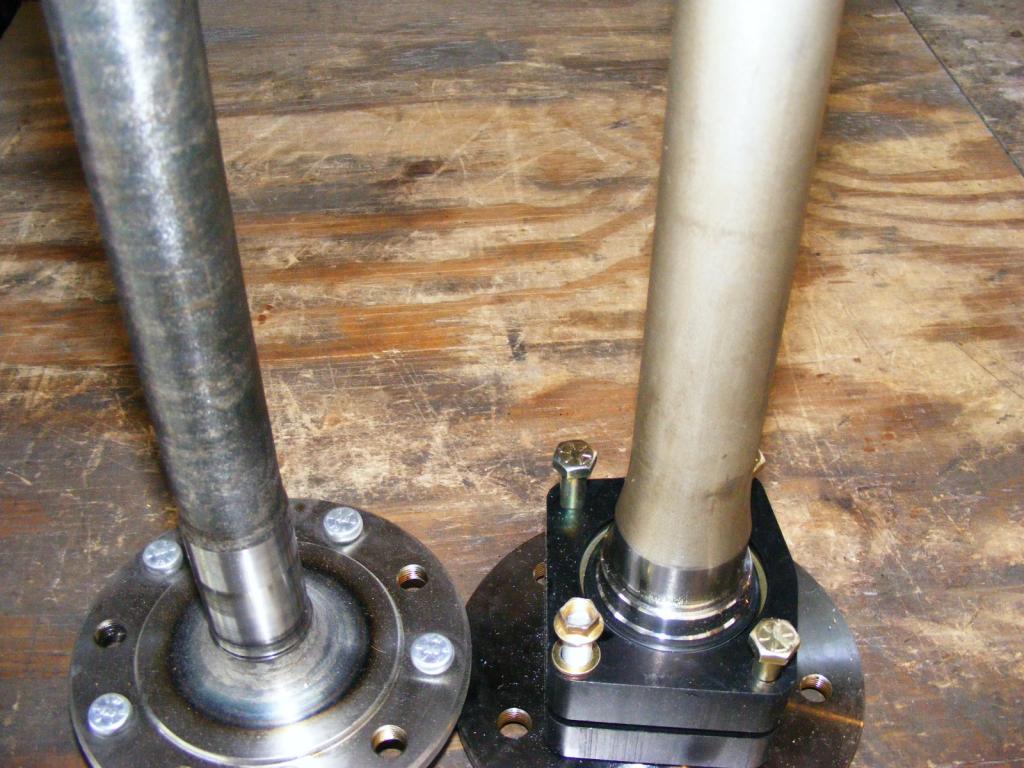 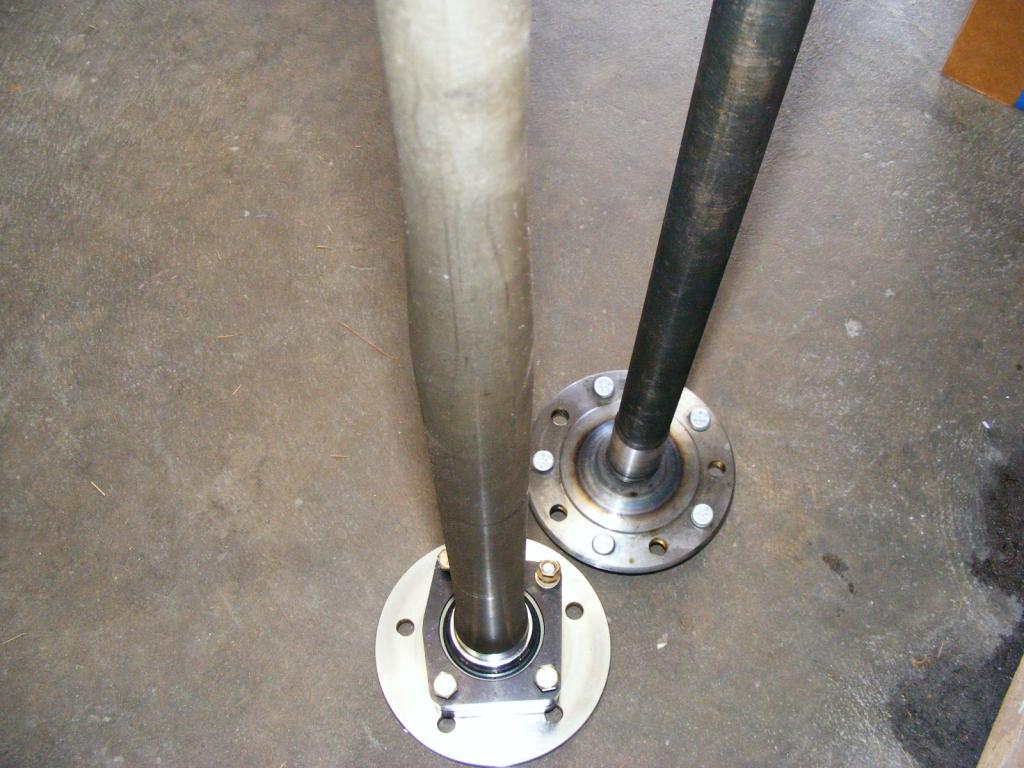 As you can see, the difference is huge, save for the very end where the splines are. It is possible to machine an OEM posi case for larger 33 spline axles and swap the spider gears out for the larger shafts, but again, I'm not going to put any more $ into this 12 bolt than I have to for now since it's not going to be under the car for much longer. After the axle seal has been removed, the OE axle bearings have to be removed. Typically a slide hammer is used to remove these, but since I don't have one and wasn't going to buy one just for this job, I made do with a home-made puller using a long piece of allthread, a few nuts and some large washers. Worked like a charm. 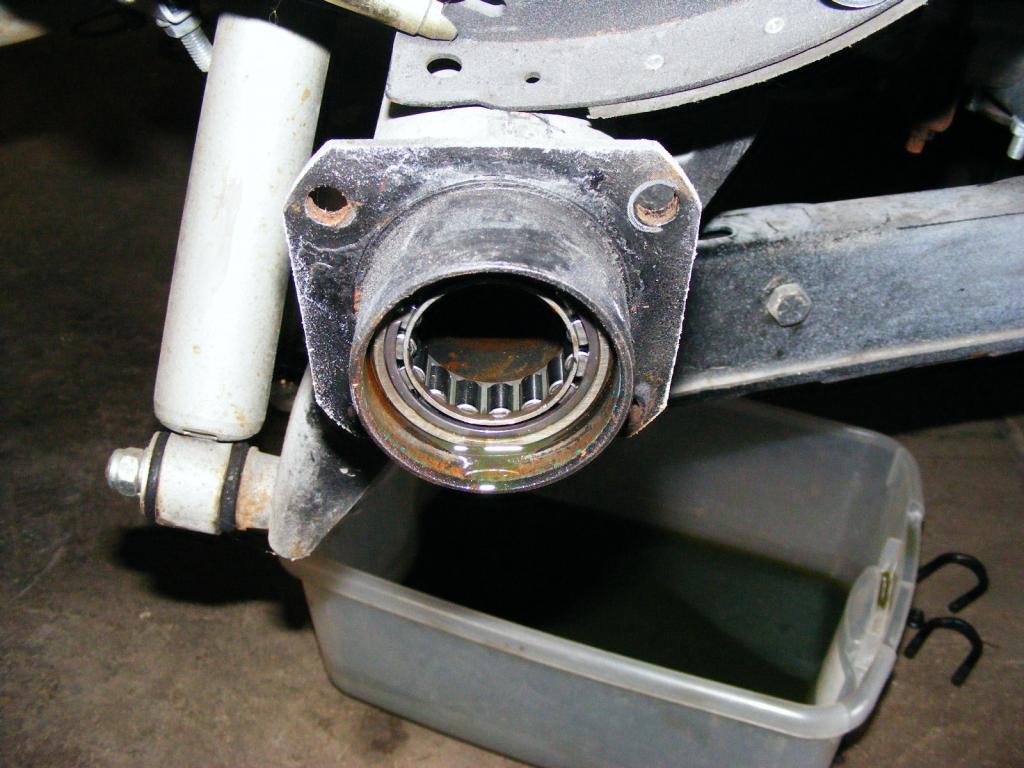 Once the bearing is out, the end of the axle tube is trimmed off. In this instance, Strange calls for no more than .0625" (1/16"  total height from the flange to the register for the backing plate. total height from the flange to the register for the backing plate.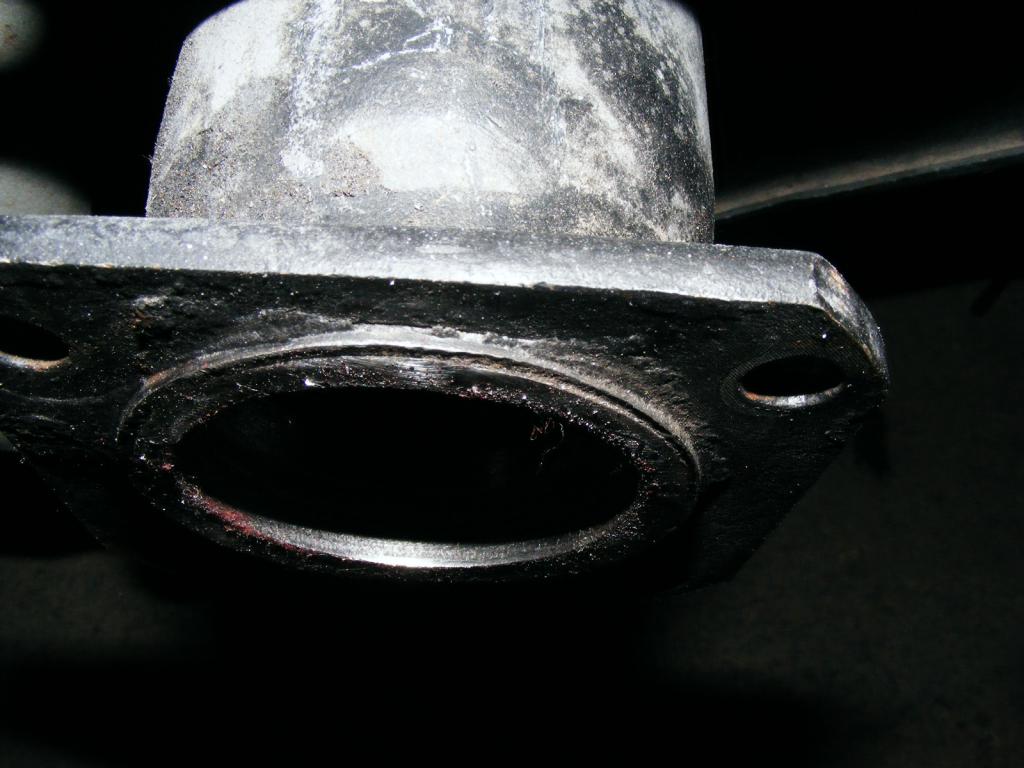 Here's where it got a bit complicated; Since these axles use such a huge outer bearing, you have to machine the inside diameter of the end of the axle tube out to 2.125" to ensure clearance for the "wedding ring", which is the small pressed-on sleeve that helps retain the axle bearing. The area to be removed is highlighted in black in the pic below: 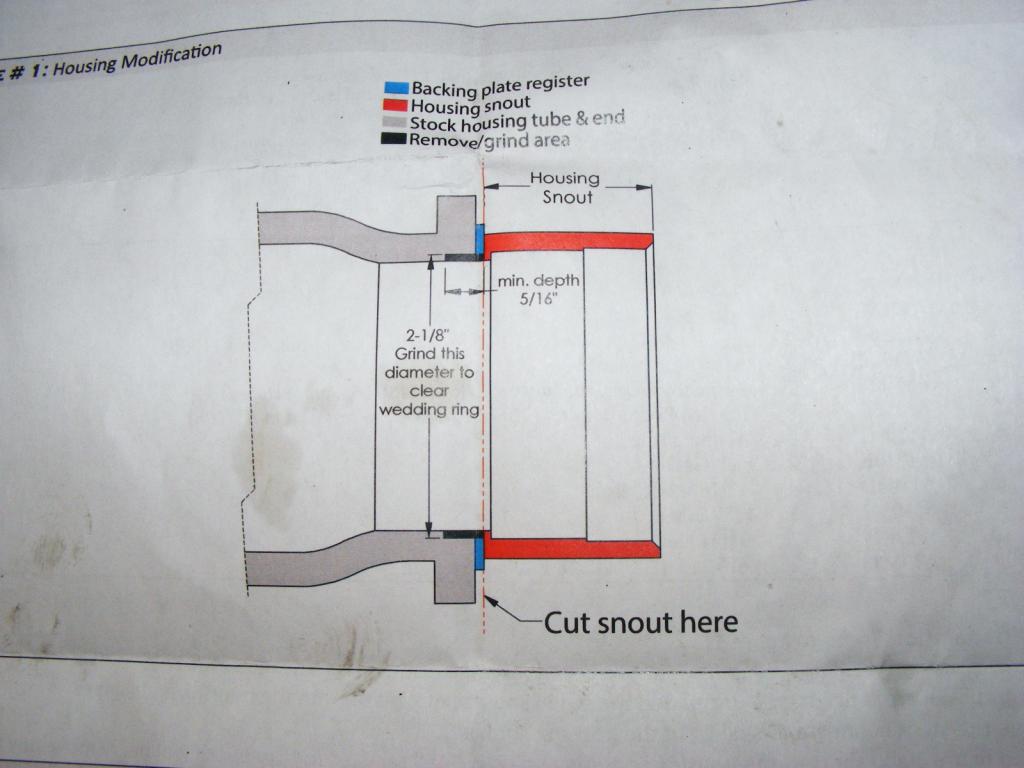 Problem is, how in the hell do you machine it? [img]<<GRAEMLIN_URL>>/hmmm.gif[/img] I spent over an hour trying to use a stone grinder on the passenger side tube, and only managed to get it out to just over 2.100. By that time my hands were stinging from the vibration of the grinder, so I threw in the towel on that approach and came up with a better plan. I went to my tool box, rummaged through the drill accessory drawer, and sure as God made little green apples, it just so happened that I had a 2 1/8" hole saw! [img]<<GRAEMLIN_URL>>/biggthumpup.gif[/img] As luck would have it, it <span style="font-style: italic">just</span> centered into the remaining register on the axle tube, so I fired up my trusty cordless drill, aaaaaaaannnnnd proceeded to get absofriggenlutely nowhere. [img]<<GRAEMLIN_URL>>/rolleyes.gif[/img] Turns out if I was gonn'a use this hole saw to do the job, I was gonn'a need something with substantially more "oomph" than my 18v cordless drill. Luckily, I had that base covered too. Meet "the arm breaker" [img]<<GRAEMLIN_URL>>/grin.gif[/img] : This was handed down to me courtesy of my great grandfather. This thing has saved my butt on numerous occasions, but as the name implies, it ain't to be trifled with. I learned early on to be <span style="font-style: italic">very</span> cautious using this thing, `cause if it grabs something, it's likely gonn'a break the drill apparatus you're using, or you're gonn'a pirouette like an ice skater whether you want to or not. 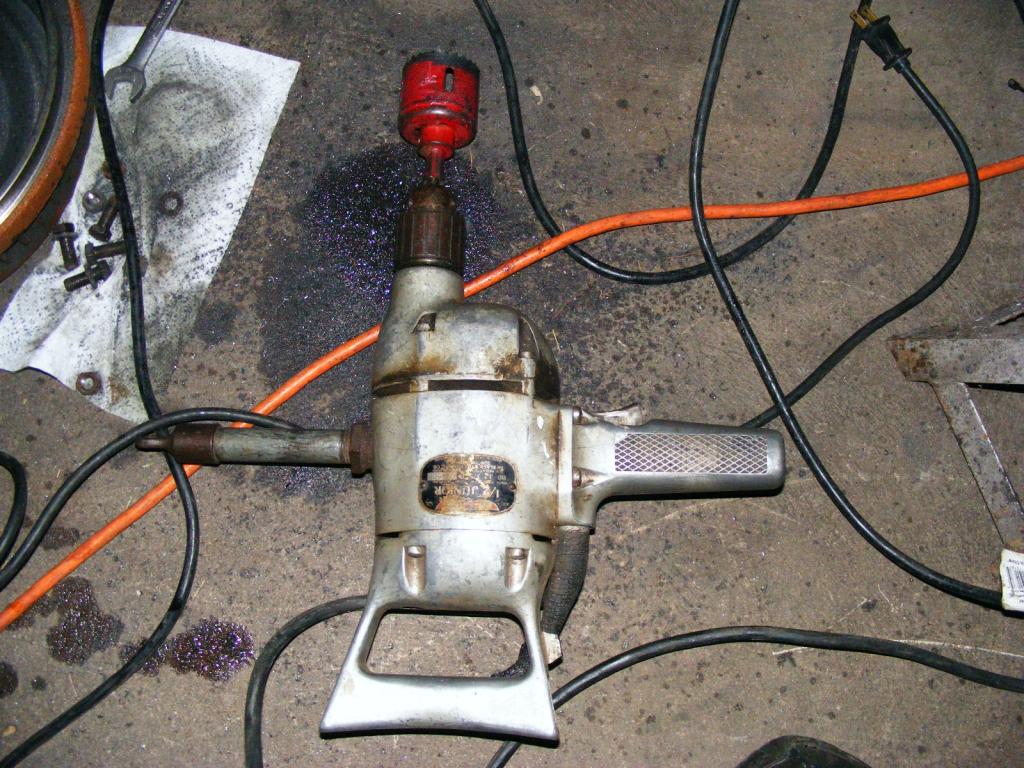 I loaded up the hole saw in the arm breaker, and <span style="font-style: italic"><span style="text-decoration: underline">cautiously</span></span> I started to grind away at the tubes. Took less than 5 minutes for each tube. [img]<<GRAEMLIN_URL>>/biggthumpup.gif[/img] 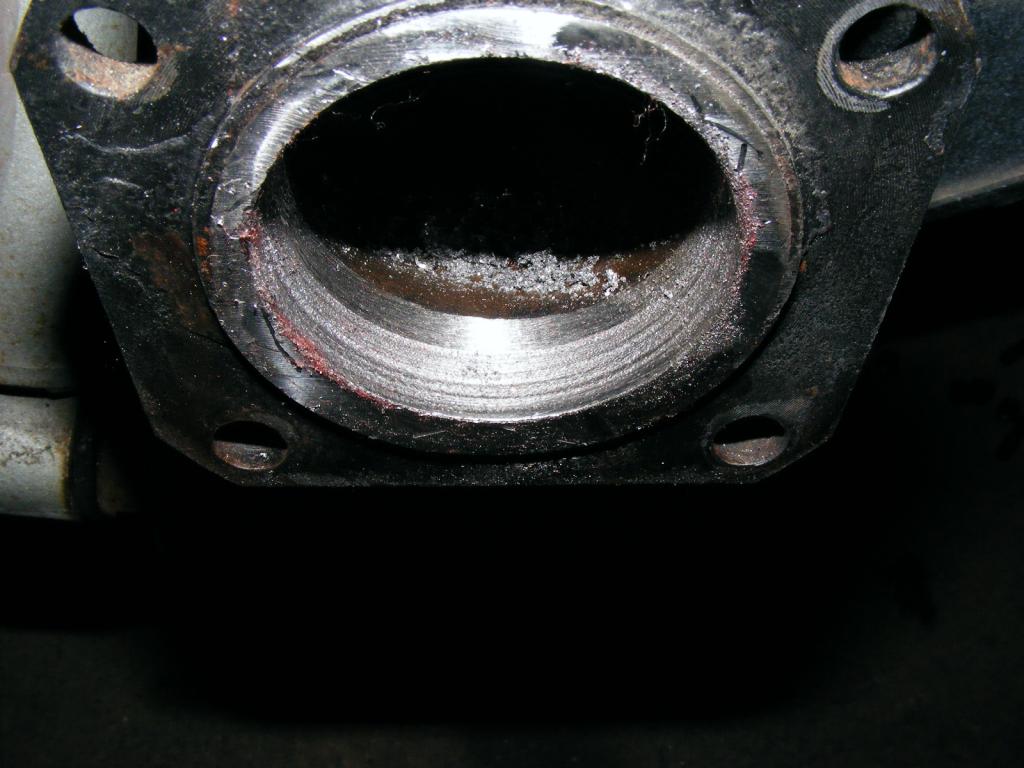 It ain't pretty, but it clears! So now everything's machined and ready to be put back together. I have to clean the axle tubes out, but that's all that's left to do. Below is the installation diagram should anyone be interested: 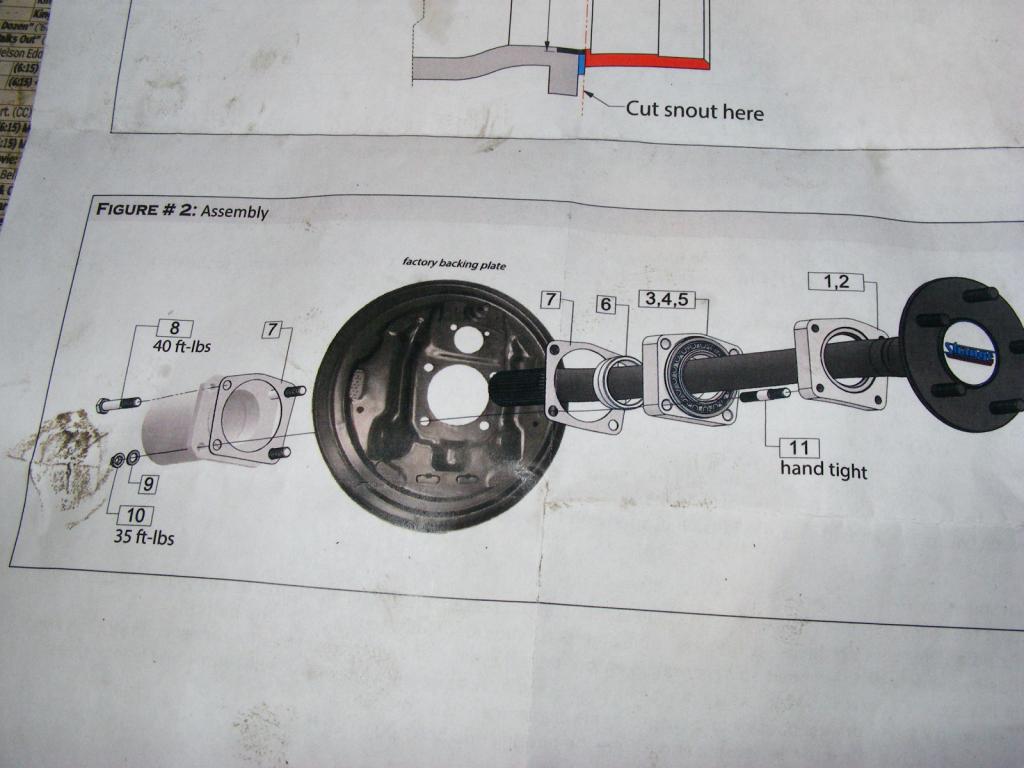 With any luck I'll have everything buttoned back up tomorrow. Oh....FWIW...I happened to check the weather forecast for next Thursday--81° and a 50% chance of rain. Naturally. [img]<<GRAEMLIN_URL>>/thumbsdown.gif[/img]
|
|
#630
05-29-2016, 10:17 AM
|
|||
|
|||
|
[img]<<GRAEMLIN_URL>>/biggthumpup.gif[/img] [img]<<GRAEMLIN_URL>>/biggthumpup.gif[/img] [img]<<GRAEMLIN_URL>>/biggthumpup.gif[/img]
__________________
 The Best things in life......Aren't Things
|
 |
|
|


 Linear Mode

