
|
|
|
|||||||
| Register | Album Gallery | Thread Gallery | FAQ | Community | Calendar | Become a Paid Member | Today's Posts | Search |


|
|
|
Thread Tools | Display Modes |
|
#421
 02-18-2017, 09:02 PM
|
||||
|
||||
|
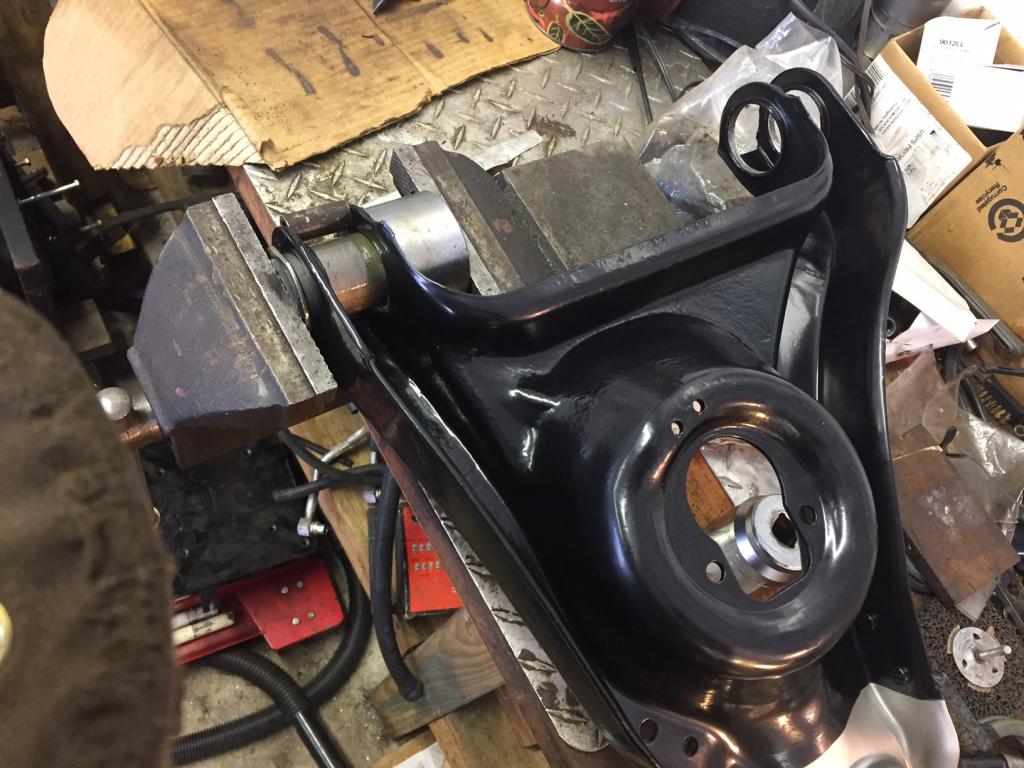
The installation of the lower control arm bushings was not too difficult. I used the bench vice and several 3/4 drive sockets to press them . The powder coat held up fine. I oiled the bushings so they'd slide a little easier.
|
|
#422
02-18-2017, 09:45 PM
|
|||
|
|||
|
----Chuck,,,I was thinking JB Weld. The only thing is that I have found it hard to feather out at the edges, but not impossible......Bill S
|
|
#423
02-18-2017, 10:59 PM
|
||||
|
||||
|
Make sure you use a spacer to keep the flanges from bending inward. I used a section of Mopar alternator bushing for the lower control arms.

|
|
#424
02-18-2017, 11:11 PM
|
||||
|
||||
|
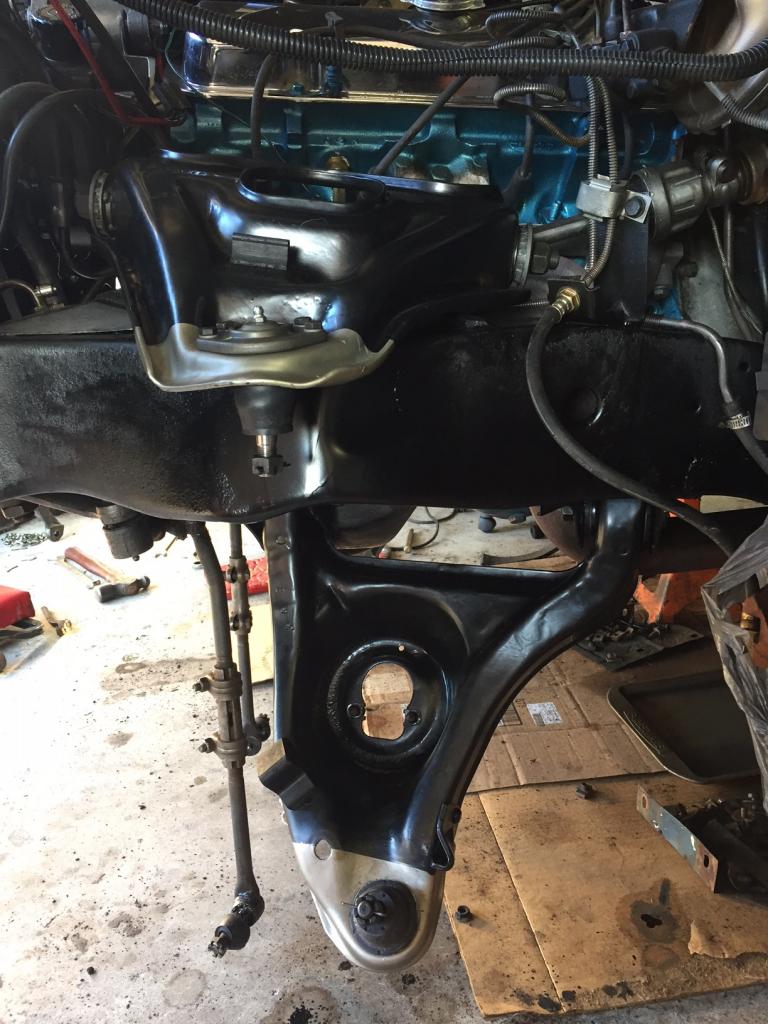
The upper control arms are a little more involved. If you try to press both bushings in without supporting the inner arms where the flanges are, it will bend the entire arm in half and destroy it. Originally there was a dealer issued tool (no longer available) that supported the area between the two arms while using a press. So I built my own...
First, I used the vice to press in the smaller bushing (1975 used a large and a small bushing, while earlier models used the same small bushing on both sides). I then set the pivot bar in place, passing it through the larger bushing hole and set the large bushing in place. I then set up the spacer bar I fabricated from the old central pivot bar that I had to cut off due to the factory spot weld. I cut it to the exact length that could run parallel to the new bar. This way I could use a couple long bolts to pin them together to hold the spacer bar from flying outward under pressure. It worked great! 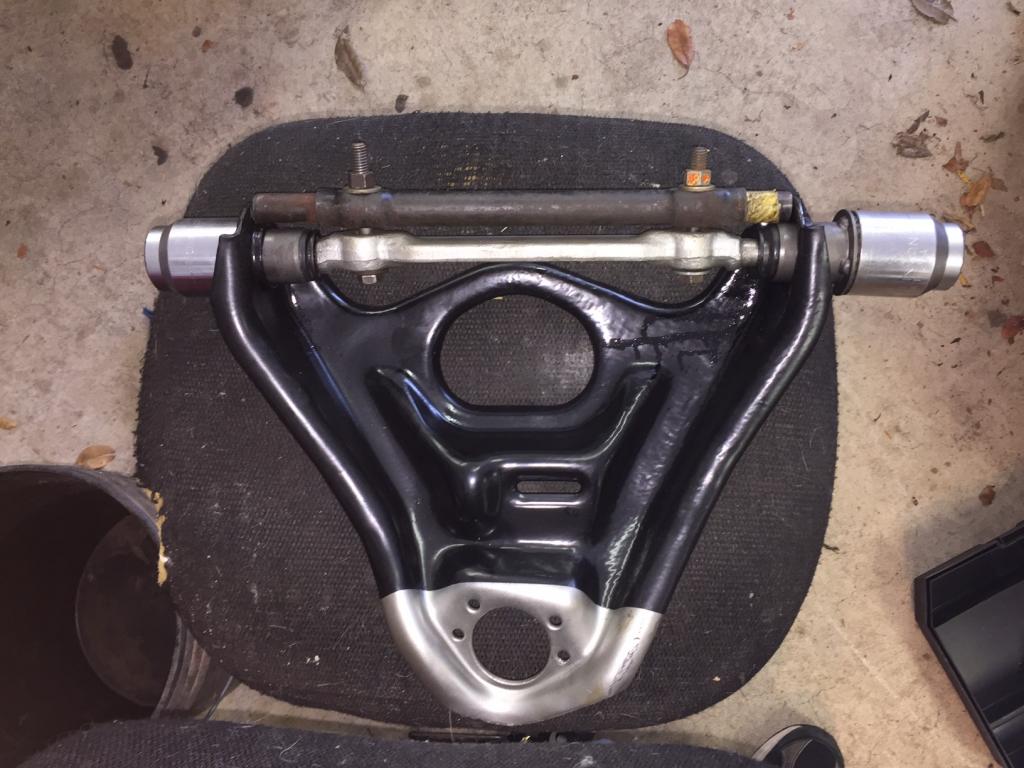 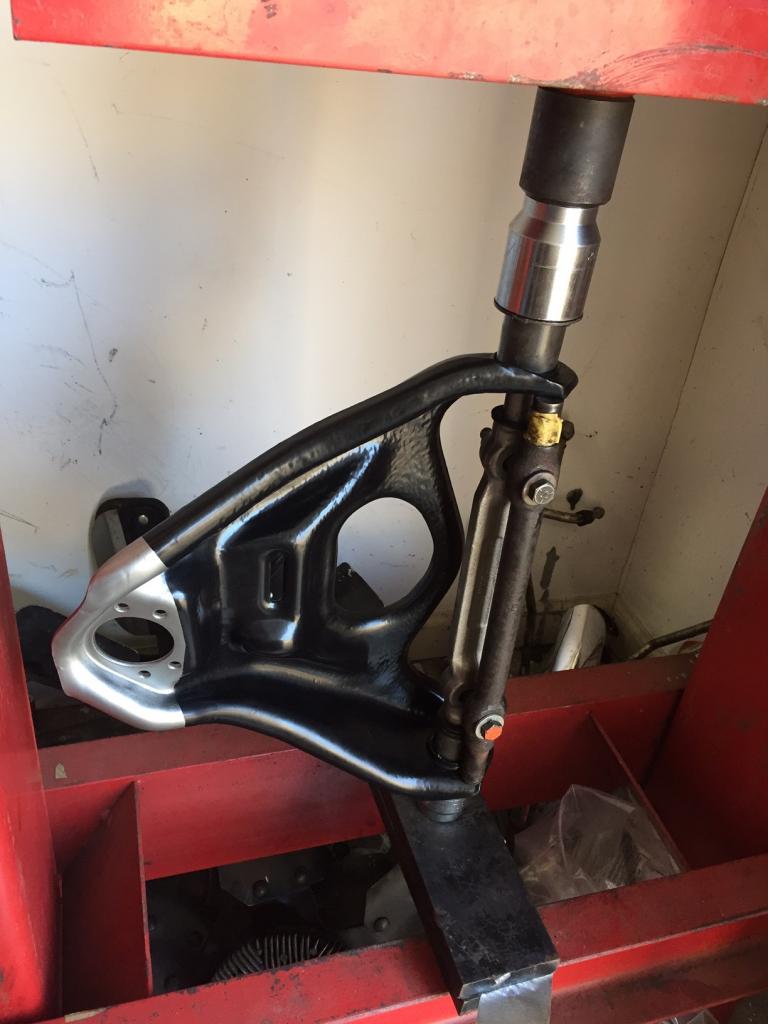
|
|
#425
02-18-2017, 11:16 PM
|
||||
|
||||
|
As for the powder coating holding up, it survived the process relatively unscathed. The silver paint did scratch off when I pressed the lower ball joints in but that was easily resprayed, and it didn't hurt the underlying black powder coating either. (although I had to buy another Moog ball joint after I neglected to account for how far the balljoint stud would protrude through the large sockets when pressed, and it bound up against the press'es floorplate and ruined the internal parts. So I had to go out and buy another one at the local auto parts store. They actually had the same Moog part in stock (at twice the price I paid for the first one). [img]<<GRAEMLIN_URL>>/mad.gif[/img]
|
|
#426
02-19-2017, 09:33 PM
|
||||
|
||||
|
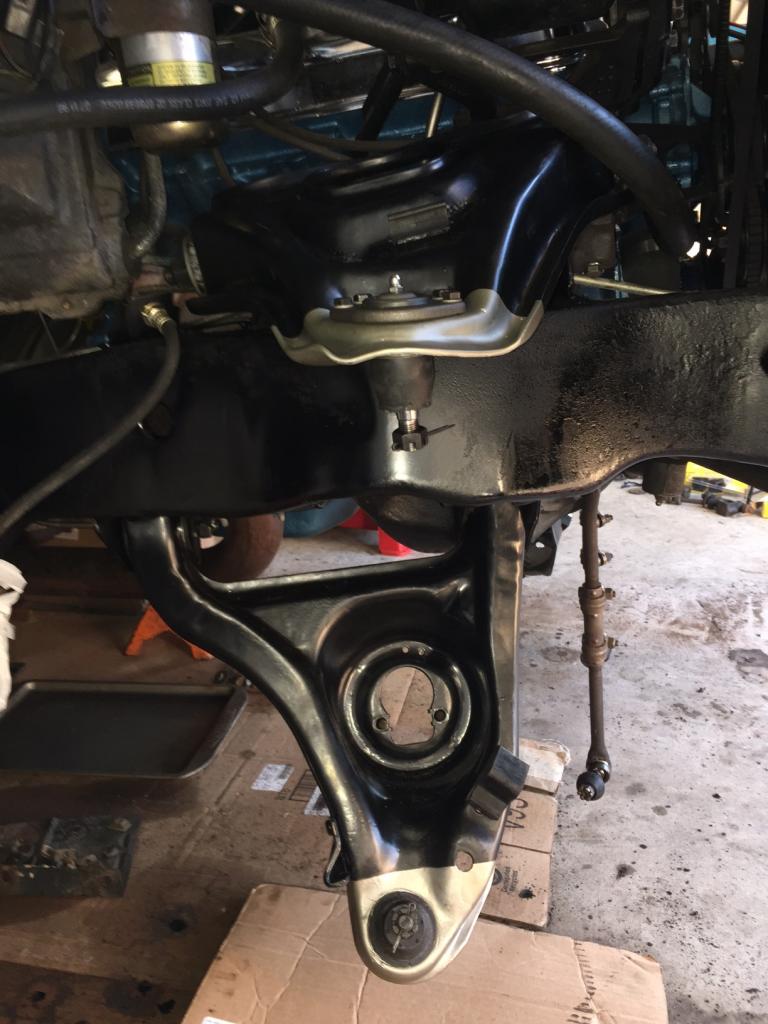
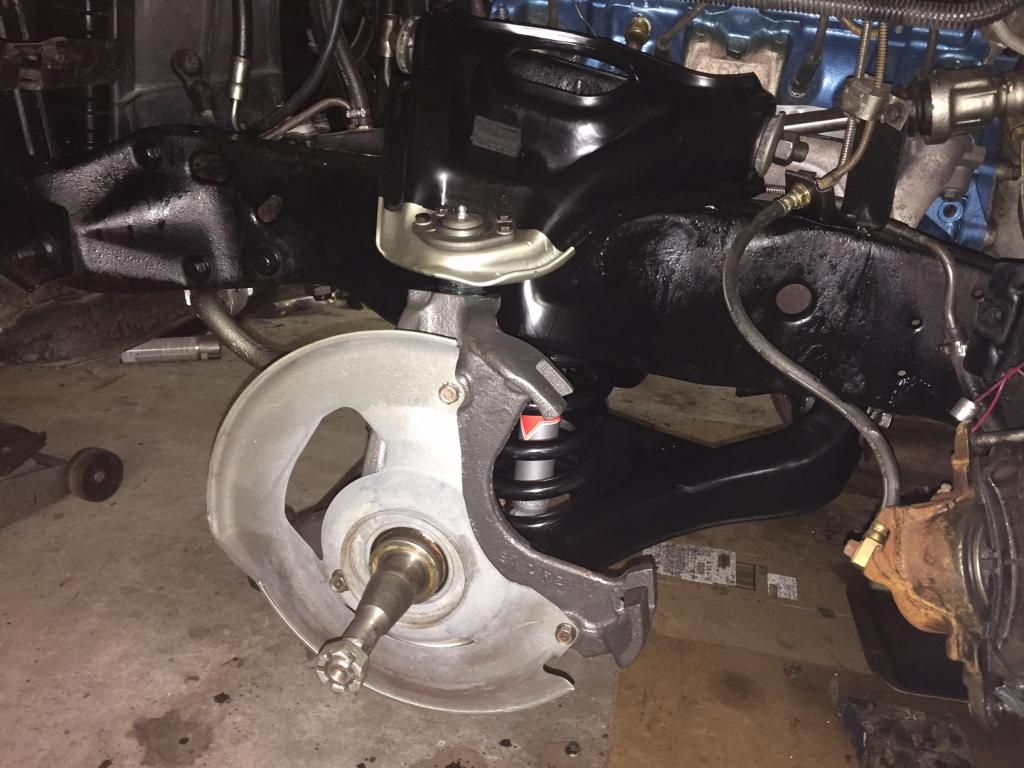
Got the replacement ball joint pressed in today and then went ahead with installing the lower and upper control arms on the car. I figure I'll leave off the freshly powder coated inner fenders so I can bring the car for an alignment and not have to worry about the guy leaning all over everything and trying the wrangle a wrench onto the upper control arm bolts if he needs to install some shims. (especially difficult on the passenger side with the A/C compressor blocking everything).
|
|
#427
02-20-2017, 11:56 PM
|
||||
|
||||
|
This morning I went out and was all ready to install the coil springs and then remembered that I did not have a coil spring compressor. Luckily my mechanic buddy in town had a vintage one he loaned me for the day. After a couple hours of labor I got the coil springs, spindles, new KYB gas shocks, new sway bar bushings, and the end links installed. Only thing left is the repacking the wheel bearings and painting the calipers. Then installing the inner fenders and getting an alignment, of course.
|
|
#428
02-24-2017, 04:10 AM
|
|||
|
|||
|
May I ask what method you used to remove the upper control arm shaft from the upper control arms so you could replace the bushings? Thank you for your documentation, I will be doing this to my '71 Camaro soon.
__________________
--Nick
|
|
#429
02-24-2017, 11:26 AM
|
||||
|
||||
|
The one with the welded nut, I had to cut the nuts off (Ouch, that didn't sound right) to get the large washers off. I then used an air chisel with a blunt tip to pop the bushings out. They are only held in by the last half inch or so, of the bushing's outer shell where it tapers out slightly. So you are not chiseling it the entire way. Once it gets past a certain point it just pops out.
|
|
#430
02-24-2017, 03:33 PM
|
|||
|
|||
|
Thank you very much, doesn't sound too bad of a job.
EDIT: Also, what kind of "plain steel" finish did you use for the tips of the control arms? Looks perfect.
__________________
--Nick
|
|
|
|


 Linear Mode

