The Saga of the Green Bastard (1970 L-78 Nova Restoration Thread)
PART TWO; BARN FINDS; Well I suppose Fake Barn Finds is more fitting !
(Im hoping that is not received as bad as fake Patina)

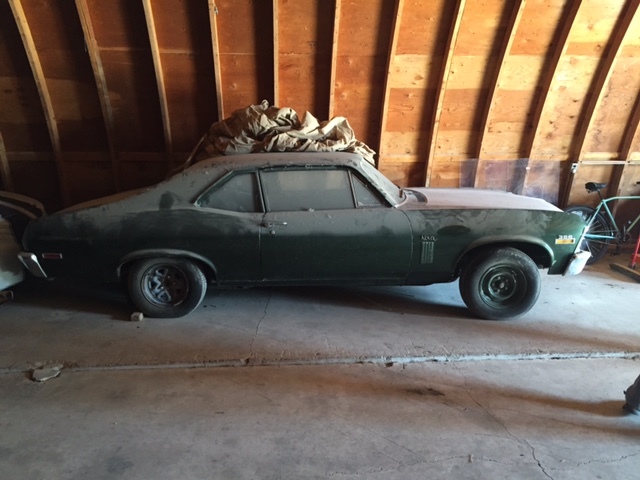
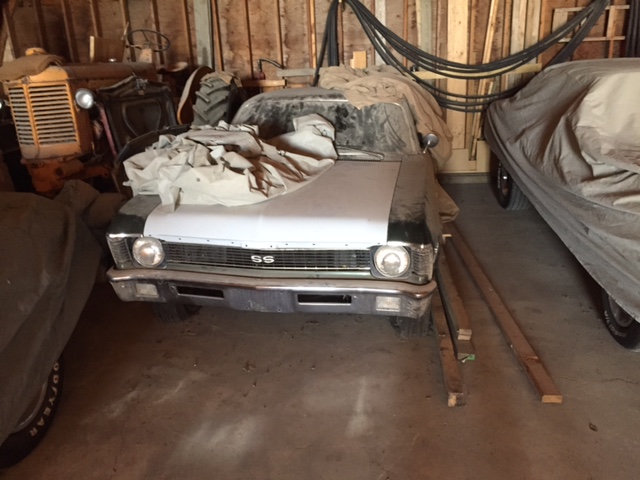
Having finished my Chevelle Convertible in 2015, in the fall of 2016 I finally brought the L-78 home for the first winter to get started. I only have a two car garage so summers are for drivers and winters are for projects. It had however been announced that our local World of Wheels car show was going to have a Barn Finds display in April 2017. Our local promoter Bob Chubala is a SUPER awesome guy and we wanted to support his efforts and have some fun. Myself and two other car buddies Dereck (different Dereck from the L78 owner) and Calvin, together hatched a plan to bring all three of our stagnant project cars to the show. So
my plans warped into doing as much work as possible without too obviously upsetting the Barn Fresh look (no washing Ha).
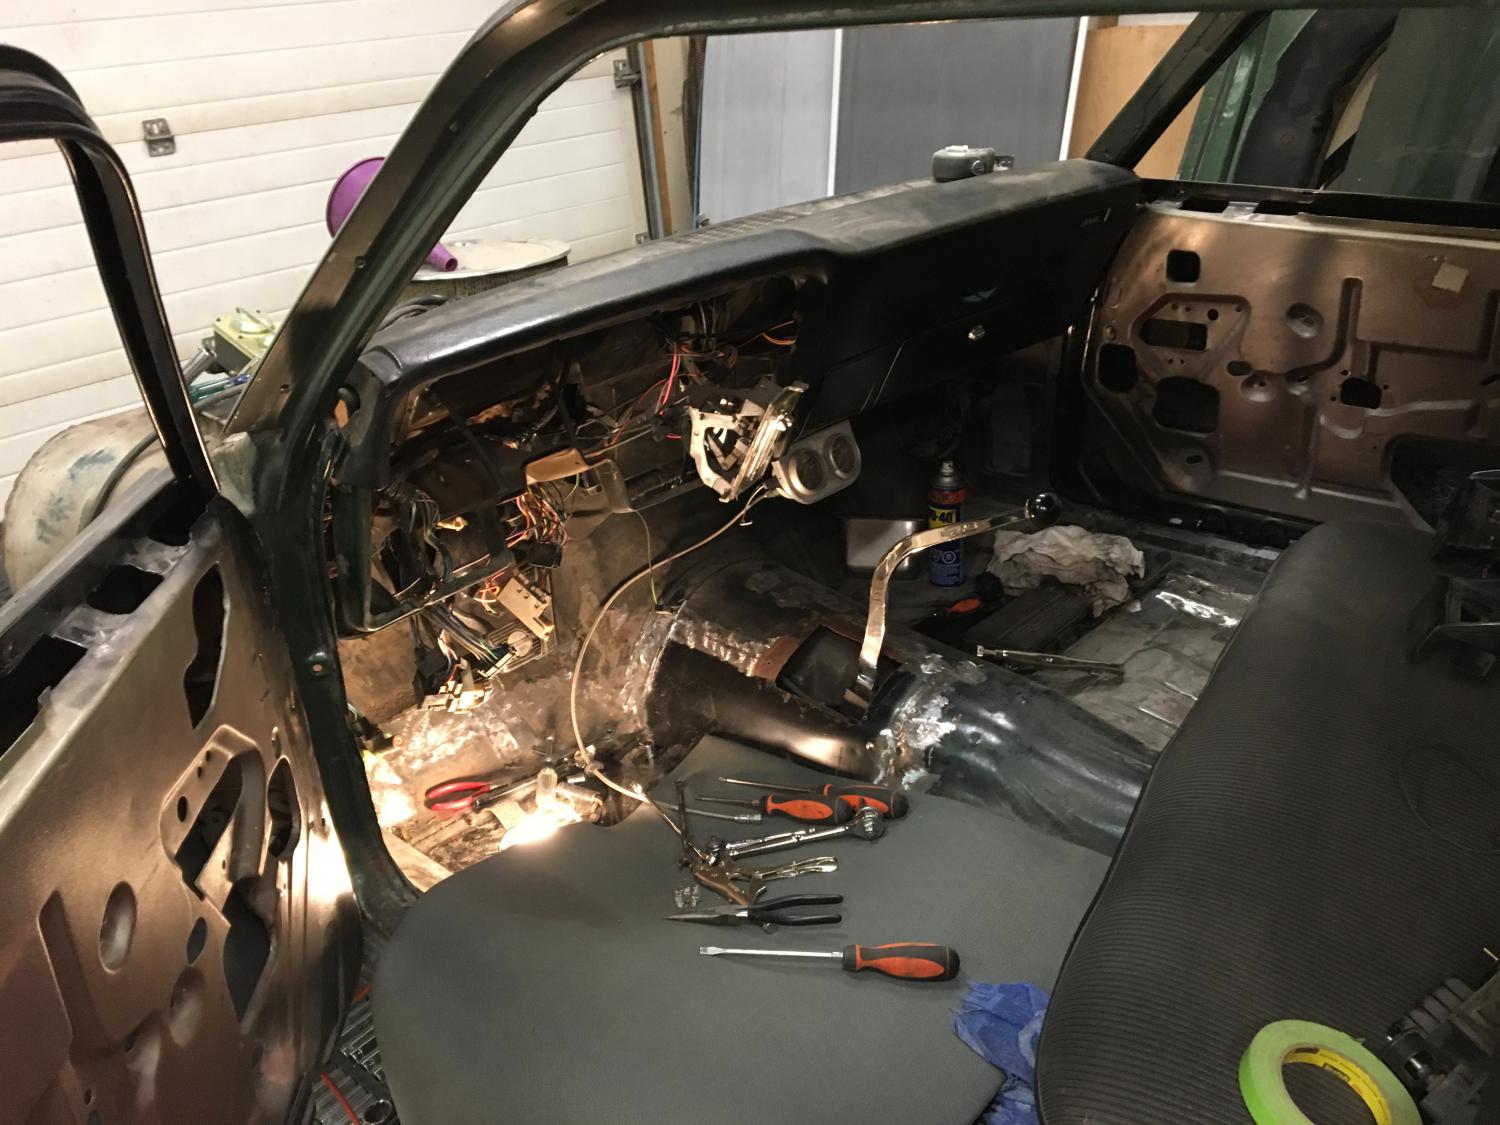
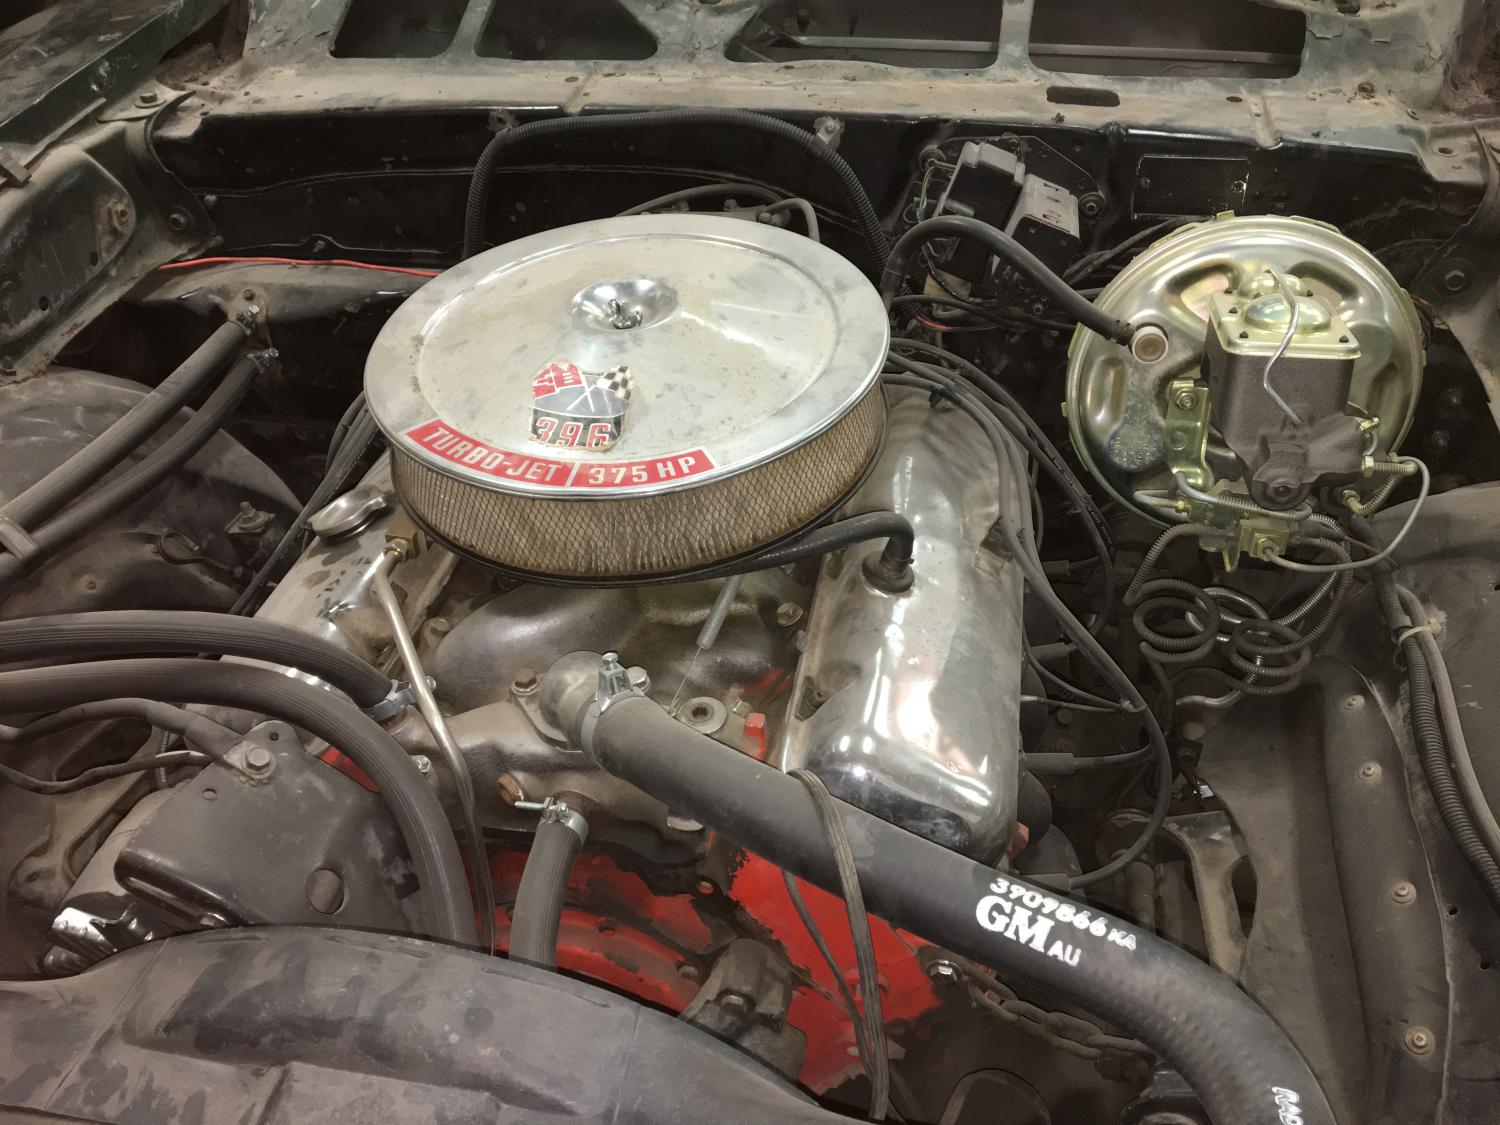
After such extended storage the plan was, put a Muncie and shifter back in (ST-10 had been sold), replace the disintegrated headers (had an exact set of used Hookers at the ready), refresh brake system (restored master and booster were ready to go), SST brake lines, new rear wheel cylinders (cheap replacements for now rebuild the originals later), SST fuel lines, new fuel tank, install a correct BB style radiator, shroud and Fan (repop), new rad & heater hoses, repair the drivers floor, toe board, and the grenade hole for who knows what shifter was in there ??, Install the mint original ($$) rubber mat I had located (Thanks Yenko Site), install a correct original bench seat, re-install the original door panels, rebuild carb, fresh fluids, set valves (rockers had been backed off for storage), pre-lube, and fire to DRIVE it in and out of the show! Oh and throw in a couple Auto Meter gauges under the dash for good measure
Short List

And we begin;
I will unfortunately have to Caveat that a snowblower/cell phone incident that winter lost a lot of my detail photos, so this chapter will be a little challenged for pics. Hey! it snowed A LOT! and that phone jumped out of my pocket unnoticed when I exited the truck. The funny part was after finding it smashed & glowing in the lane it actually took me a moment to realize it was mine... DOH!
A portion of the drivers floor was rusted through (4-6under heels and 3-4up the toe board). To make the repair undetectable from the bottom side I decided to replace the pan section from the under heel seam all the way back to the under floor crossmember where it could be welded from topside and not be visible from below. The pan had enough metal to wrap up the tunnel and be trimmed to exactly match the original shifter hole cut out. Between the few original screw holes that remained and an original lower bezel, I figured it out. The toe board was trimmed to required size, plug welded at the seam (per factory spot welding) and butt welded and metal finished where it would be visible along the top edge and in the portion in the tunnel. Some of the final welding was left for the rotisserie later because it was too difficult to access assembled. The underside forward body brace was surprisingly solid (it is heavier gauge).

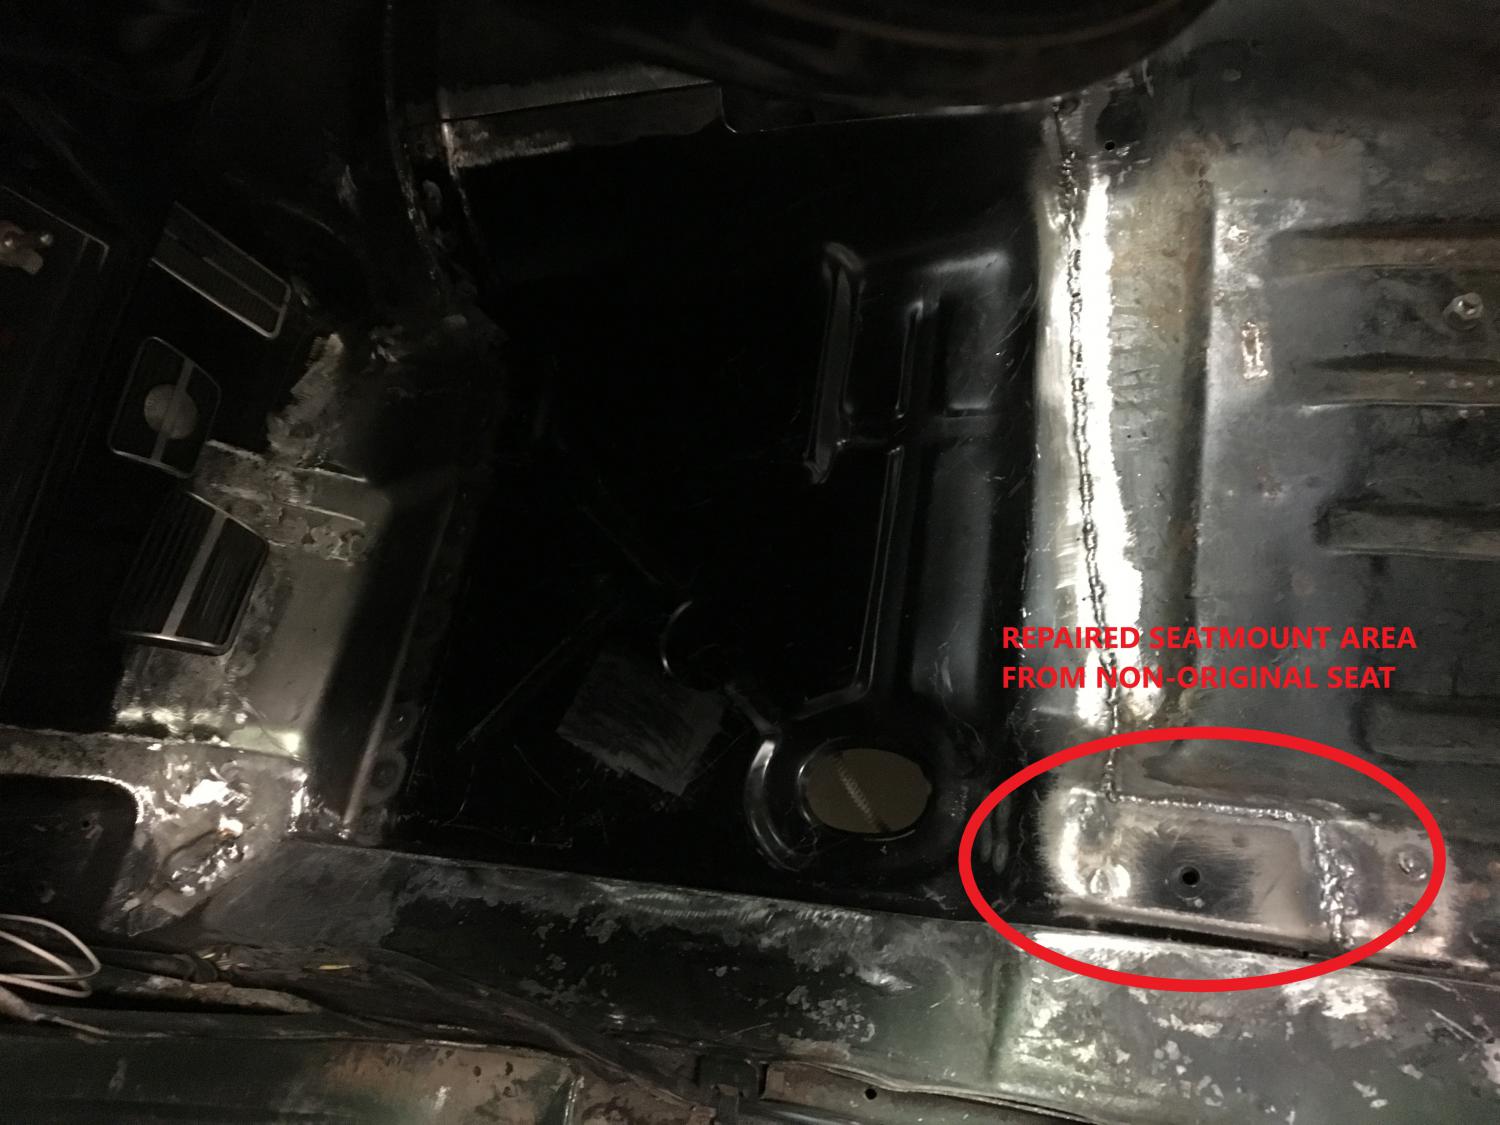
Green Bastard part one. At some point the car had been fitted with a GM bench seat with a fold down arm rest (Monte?). It was done early in it's life as I always remember that strange seat in the car. To accommodate the seat, the section of floor pan at the front seat mounts was POUNDED down to lower the seat
. A LOT
2+ inches!! It took Herculean effort to reform (pound back up) the sections and weld in patches to make it fit a stock seat and be indiscernible from both sides
I mentioned Ken was from a small town and working on the car I quickly learned that every orifice under the car was completely filled and plugged with dried silt from gravel road spray residue. It gets everywhere and hardens like stone once dried out.
Green Bastard part two. Anyone who has run high speeds on gravel roads with a carload of pals knows you often times bottom out. The rear foot wells (floor pans) were so hammered up it literally took a sledge hammer and my trusty chunk of RAIL to coax them back to position and a several hours of hammer dolly work. More Herculean effort. I considered replacing them but they were very solid and in the end turned out surprisingly well.
The radiator was purchased locally from a 68 BB Camaro (which went to Aluminum). I had also bought one from WilmasBoy here which will end up in my Acadian at some point. Shroud was purchased from GM way back when I bought the car. Fan is a repop and is a decent piece if youre not concerned with full concours restoration (which I am not). In your face is what I believe to be the original equipment block heater plug, welcome to Canada. Also notice the chain to hold the engine under torque. The original equipment engine mounts are still in the car. Recall how Mr Fast said he launched the car


Most of the rest was just plug and play with a little cleanup along the way.
Attachment 211857


To be continued Barn Finds PART B