
|
|
|
|||||||
| Register | Album Gallery | Thread Gallery | FAQ | Community | Calendar | Become a Paid Member | Today's Posts | Search |


|
|
|
Thread Tools | Display Modes |
|
#361
 02-11-2013, 02:34 AM
|
||||
|
||||
|
Its a 1971. You can tell by the little squares in the grills and the seat pattern. Is that a British or Australian license plate?
Nice vintage first generation BFG Radial T/As, Cragars, and black sidepipes. The chick is vintage late 1970s wth the Dorothy Hamill "Camel" hairdo and the spaghetti strap dress. BTW, there was one black 73 SD T/A produced. It still exists. Its a rather famous story. The original ordering dealership figured a way to get an SD allocation by making up a story that a longtime customer wanted a black Trans Am and was prepared to buy a black Camaro instead. So when Pontiac gave them the OK to special order a black Trans Am, the dealer just happened to order it with the SD455 engine option. The car was delivered with a red front bumper, and red spoilers/flares since those items were produced in color already. And were supposed to be painted black by the dealer upon arrival. The dealer kept them red. 
|
|
#362
02-17-2013, 05:14 PM
|
||||
|
||||
|
I've been doing some more hunting and found some NOS stuff for the unitized project. I located an NOS ignition module, and NOS distributor cap housing and an NOS coil (which is on the way at the moment).
I also found another remanufactured unitized distributor at an online auto parts store and when I opened the box it turned out to actually be a 1972 1112127 (455 non-HO) with a 1K13 date code. So that is as close as I'm going to get to a 1112133 at the moment. And seeing that I only spent about 1/8 of the cost of a 1112133 for it, I was quite happy.   Here's the instructions with the NOS control module. It even had the little tube of heat-sync grease still in the box. 
|
|
#363
02-22-2013, 01:05 PM
|
||||
|
||||
|
The NOS coil pack arrived yesterday. There is a slight difference in finish from the original which has a somewhat visible fiberglass grain texture and the slightly glossier NOS piece which is still dated from late 1971. So maybe the gloss gets worn away after the electrical heat from usage.
 
|
|
#364
02-22-2013, 05:36 PM
|
|||
|
|||
|
Nice finds, and awesome luck on that '72 distributor.
__________________
1968 Camaro Ex-ISCA Show Car John 10:30
|
|
#365
02-22-2013, 07:08 PM
|
|||
|
|||
|
A couple years ago, a guy bought a remanufactured distributor from CarQuest for about $65, for his 70 GTO. He checked the numbers, and it was for a 1970 RAIV. He put it on E-Bay, and it sold for over $1,100.
Strange what you find at some of these auto parts stores. [img]<<GRAEMLIN_URL>>/wink.gif[/img]
__________________
1959-1980 Pontiac Window Sticker Reproductions : PontiacWindowStickers.com DVD's for Musclecar fans! MusclecarFilms.com
|
|
#366
03-16-2013, 10:58 PM
|
||||
|
||||
|
I got the 1112127 unitized distributor back from getting the advance curve set. I installed it today and the car started right up. It actually sounds like its running smoother than with the HEI. The HEI had an old set of wires so it's probably the new wires helping things out.
  Unfortunately it is snowing outside at the moment so a test drive will have to wait a day or two...
|
|
#367
03-24-2013, 04:11 PM
|
||||
|
||||
|
I've been playing at the Votech class and doing more cutting and welding. It's quite amazing what you can get done in three hours when you have a dropdead time to move it out of the shop and head home when the class is over. I spent one class cutting and trimming the bad section of the upper drop-off that mated up with the outer wheelhouse on the driver's side. The seam between the two panels was soft so I elected to cut the seam out so I had an easier area to weld from (inside the trunk), instead of trying to recreate the mated area underneath the car which is blocked by the frame rail.
Here's the before shot:  And after trimming:  I used the upper portion of the drop off and an extra leftover section of flange and welded them together to pre-form the mated seam between the trunkfloor and the drop off:   And here is how the replacement piece fits: 
|
|
#368
03-24-2013, 04:39 PM
|
||||
|
||||
|
The following week, I welded the replacement section in place and then grinded...a lot!
 I also prepared the second replacement piece out of the aftermarket wheelhouse that I bought to serve as a donor supplier of repair sections. I also had to recreate a small section of the inner wheel house edge that the overlapping "flap" mates to. (All that crusty black stuff is old undercoating and will be scraped out of there soon).  And here it is after some minor body work and filler: 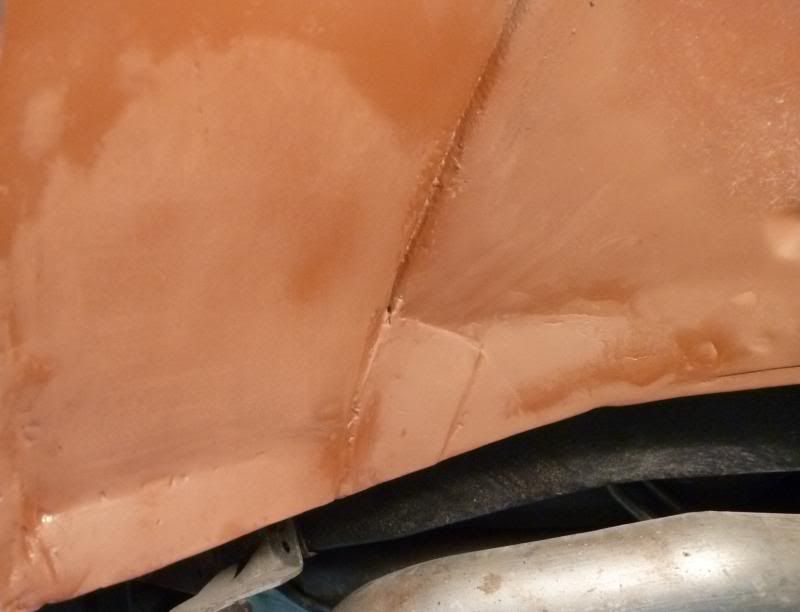 as compared to the opposite untouched side: 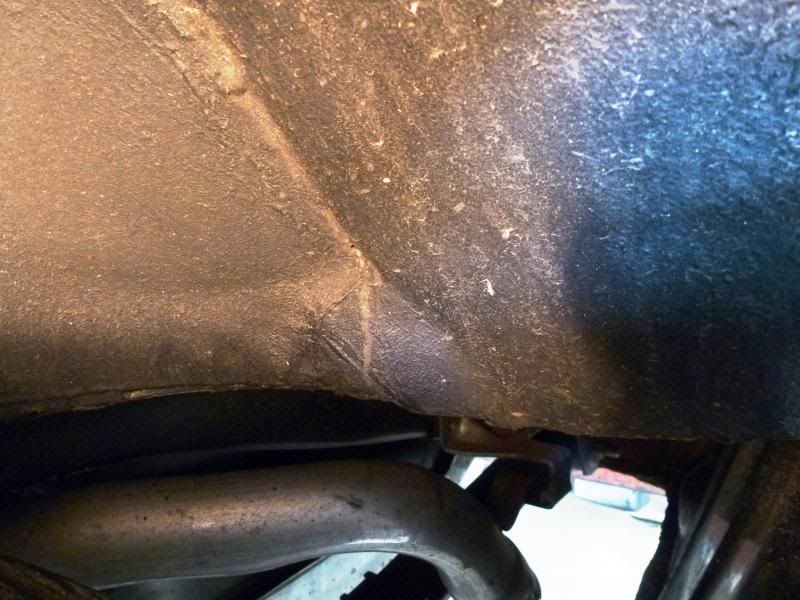
|
|
#369
03-24-2013, 04:49 PM
|
||||
|
||||
|
And after consulting my "before" photos and examining the trunk in my Grandma's '75 Firebird, I spent yesterday using two tubes of seam sealer to replicate the horribly gooped up application of the factory seam sealer. After letting it set overnight, I then used some MEK solvent and a brush and nitrile gloved fingers to replicate the original look as close as possible. No matter what I did it still looked "too nice" to be factory applied. [img]<<GRAEMLIN_URL>>/grin.gif[/img]
Here's Grandma's '75 Firebird trunk:  and the '72:  And the driver's side, too:  
|
|
#370
03-24-2013, 05:40 PM
|
|||
|
|||
|
Looks really nice Steve. Instead of you asking me for help with your car, I might be asking you for help with mine!
|
|
|
|


 Linear Mode

