
|
|
|
|||||||
| Register | Album Gallery | Thread Gallery | FAQ | Community | Calendar | Become a Paid Member | Today's Posts | Search |


|
|
|
Thread Tools | Display Modes |
|
#671
 09-02-2020, 01:12 PM
|
|||
|
|||
|
That is going to look sweet with the Keystones Steve, excellent choice.
__________________
1968 Camaro Ex-ISCA Show Car John 10:30 
|
|
#672
09-02-2020, 01:16 PM
|
||||
|
||||
|
Maybe Jim has some ideas on this as I'll explain in a minute, but I'm claiming
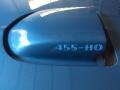
 on those. All drums are the same yet the red paint signified that Road Wheels were to be installed on the car. I highly doubt Chrysler had two sets of rear drums on the shelf since how would they know how many of each to have on hand? In theory, they could have 1000 sets of drums on hand extra each day and I'm pretty sure that's not good for business. on those. All drums are the same yet the red paint signified that Road Wheels were to be installed on the car. I highly doubt Chrysler had two sets of rear drums on the shelf since how would they know how many of each to have on hand? In theory, they could have 1000 sets of drums on hand extra each day and I'm pretty sure that's not good for business. And with that, Jim has posted pictures of his survivor cars further back in this thread that not only show the correct style application of the paint but also shows the red paint sticking to the wheel after they were installed. Not flakes of dry paint, but wet paint. So what I surmise is after the drivetrain was installed, it was noted on the line that "Road wheels" were optioned and they painted the drums. That would make more sense to me than a stack of red drums on the shelf. Too many logistical inaccuracies that I could list to have them painted by the supplier or by Chrysler when they arrived at the plant. Cheers  Dave Last edited by A12pilot; 09-02-2020 at 01:21 PM.
|
|
#673
09-02-2020, 01:18 PM
|
||||
|
||||
|
And yes, Steve. Get a set of 15" Keystones and keep the stock 14s in the garage! That would be sweeeeeeeeet!!
 Cheers Dave
|
| The Following User Says Thank You to A12pilot For This Useful Post: | ||
markinnaples (09-02-2020) | ||
|
#674
09-02-2020, 03:00 PM
|
|||
|
|||
|
Quote:
|
|
#675
09-02-2020, 03:06 PM
|
||||
|
||||
|
I thought it looked way too suspiciously like my FE5 red paint from an old can of enamel. Maybe I can bottle it and sell the paint as NOS assembly line red drum paint!!!
|
|
#676
09-09-2020, 01:13 AM
|
||||
|
||||
|
With the issues with the site for the past few days I wasn't able to upload any updates. So here's some stuff.
I painted the shaker dome in the same matching chunky-sparkley-argenty paint that the grill was done in. It came out nicely though my recycling trash can/painting dolly is now kind of sparkley from overspray and is at present, the envy of the neighborhood. Anyway, here's a couple shots of what the underside Rube-Goldberg mechanism looks like. There are two fresh air doors: one that lets air into the shaker grills and one that has a bypass trapdoor to the underside of the baseplate for rainy weather. The doors connect via a linkage arm which is connected to a repurposed vent cable, that goes through the shaker metal baseplate and connects to a bellcrank on the underside of the baseplate. Another actual vent cable (with the word "vent" covered over with a red foil label that says "Fresh Air" connects to that and goes through the firewall and under the center of the dash. When you manually operate that Fresh Air vent cable, it moves whichever door you intended to open or close for whatever purpose you deem necessary. Final photo is of the two piece baseplate - the metal outer ring with the trap door hole, and the unobtanium, single four barrel, Carter AVS baseplate for a 1970 only, 340 only, shaker hood 'cuda. (1971 used a Carter Thermoquad which used a different height baseplate). Interesting trivia fact: Fram made all the shaker dome parts up in Canada, for the E-body cars, hence the "Made in Canada" stamp on the outer baseplate. One thing you have probably noticed are the seven 1/2" holes in the outer perimeter of the outer shaker baseplate ring. I noticed these as well when I went to bolt the shaker down and the bolts fell right through the holes. Well, it turns out that this baseplate was among a bunch that slipped out of Fram back in the 1970's without having the circular, flanged, nut inserts tack welded in place. Luckily Dave had an extra three and half pairs of the "special nuts" and I was able to use some JB weld and set them in place, after this photo was taken. Last edited by njsteve; 09-09-2020 at 02:19 AM.
|
|
#677
09-09-2020, 01:26 AM
|
||||
|
||||
|
I was rummaging through my 40 year old boxes of shrapnel and found two original 'cuda340 emblems. They were kind of faded but the chrome was excellent. So I soaked them in lacquer thinner overnight and used a brass bristle toothbrush to remove the paint residue. I then sprayed the with flat black and used a small rag with some reducer on it to wipe away the black off the face of the emblems.
The interesting fact is that original shaker hood emblems have three mounting prongs, while standard steel hood emblems have only two prongs. Since the odds of finding a real three pronged shaker 340cuda emblem are about as likely as me finding another hemicuda ragtop in my garage that I forgot to sell really cheap decades ago, I decided to use the two pronged emblems since they cover the middle prong anyway. This way only my hairdresser will know for sure. Here's a comparison of an original three-pronged shaker hood 'cuda440-6 emblem next to the 'cuda340 emblems (after I did the blackout treatment). After the blackout dried, I used some thinned out FE5 Rallye Red enamel (the same stuff I brushed on the brake drums) in a paint syringe bottle I got off of amazon. That worked great. I just let the syringe fill the channel with red paint, waited til it dried a little and then wiped it off the raised chrome edge with some reducer and a paper towel. I then cleared over the entire emblem. Last edited by njsteve; 09-09-2020 at 01:36 AM.
|
| The Following User Says Thank You to njsteve For This Useful Post: | ||
SS427 (09-14-2020) | ||
|
#678
09-09-2020, 01:37 AM
|
||||
|
||||
|
And here's the shaker all finished, all sparkley and drying in the sun.
|
|
#679
09-09-2020, 02:01 AM
|
||||
|
||||
|
I also started working on getting the grill in place because I got tried of seeing the toothless grin of the purple mobile every time I opened the garage.
That was a little more involved than I thought. The reproduction grill is a great piece, in and of itself. It's the stupid stuff that "soiled my good mood" (a quote from the now framed, two page critique written by my then 6 year-old daughter concerning the behavior of her 1 year old little brother). The headlight buckets have two small Philips head screws that go through two holes in the outer perimeter. The screws go through the headlight buckets and into two white plastic inserts that snap into the inside of the fender edge. First the headlight buckets don't fit because the inserts are twice as long as they need to be and won't let the headlight bucket even get into place. Then, once I sawed off half the height, the headlight bucket would actually go into place. The new problem was that the predrilled holes were about 1/4" away from the actual inserts. Not even close. So I pull out the headlight buckets and look at the hole. On the back side of the headlight inserts is a small raised, reinforced area where the hole should be. Now how frikken hard should it be to actually drill the mounting holes in that exact spot like the original buckets had, versus just randomly drilling a couple holes within a 1/2" or so???? Oh, and of course they were kind enough to include four chrome bevel headed Philips headed screws that were the size of something you would attach decking to your back porch with. If actually used, they would have instantly shattered the plastic once they were tightened into the much smaller countersunk hole in the plastic. Therefore, I once again went rummaging through my buckets of bolts and found the correct sized, tiny, bevel headed chrome screws for the buckets and used those instead. So I had to drill new holes and then fill the old ones in the recently painted buckets. Luckily I had some leftover sparkley paint from the shaker. Once that was done, the grill bolted up nicely. The only finagling was to remove the two front bumper bolts so the elastomeric bumper could be lowered a couple inches to allow the grill to clear without scratching the paint. I was also able to "adjust" the factory hood pins to clear the holes in the hood. The hood pin mounting flange is a separate bracket on the front of each fender edge, inside the engine compartment. They are painted with the car and not really adjustable. Even though the hole in the mounting plate lines up with the hole in the hood when viewed from above, the pin itself pokes up through at an odd angle which doesn't work. So I used the old factory "adjustment" method. I placed a 1/2" deep well socket over the hood pin, attached a 12" extension to the socket, and gently bent forward just a hair. Voila, the two pins aligns up perfectly now! And the pièce de résistance was finding a pair of original 1970 flat, hairpin, hood pin clips in my box of old emblems in the closet. (same place I found the 340 emblems!) Last edited by njsteve; 09-09-2020 at 02:23 AM.
|
| The Following 11 Users Say Thank You to njsteve For This Useful Post: | ||
427TJ (09-09-2020), Arrowsmith (09-09-2020), big gear head (09-12-2020), Igosplut (09-11-2020), Lee Stewart (09-09-2020), markinnaples (09-12-2020), olredalert (09-09-2020), RPOLS3 (09-09-2020), scuncio (09-09-2020), Woj (09-09-2020), X66 714 (09-09-2020) | ||
|
#680
09-12-2020, 01:05 AM
|
||||
|
||||
|
Got the interior parts delivered today after a month or so on order. Unfortunately, they first shipped the $1700 order to someone with the same name as me in another state. I always check my tracking info and I noticed something wasn't right with the destination listed and gave them a call. They immediately contacted UPS and had the shipping cancelled and returned to sender. Once it arrived back, they inspected and reboxed and reshipped to me at the correct address. Everything arrived safely in four giant boxes this afternoon.
Soooo sorry PennsylvaniaSteve, you didn't get a free cuda interior on my dime, this time. Luckily I have Grampa's Lincoln to lay out all the pieces on. Last edited by njsteve; 09-12-2020 at 11:39 AM.
|
| The Following 2 Users Say Thank You to njsteve For This Useful Post: | ||
big gear head (09-12-2020), markinnaples (09-12-2020) | ||
|
|
|


 Linear Mode

